
Pikmin: Wide World: Difference between revisions
(Updated that, finally.) |
|||
| (90 intermediate revisions by 2 users not shown) | |||
| Line 1: | Line 1: | ||
{{ | {{italic title}} | ||
{{fa}} | |||
{{PWW}} | {{PWW}} | ||
{{infobox | {{infobox PWW | ||
|image= | |game=y | ||
|size= | |image=PWW box art.png | ||
| | |size=200px | ||
| | |icon=Pikmin Wide World icon.png | ||
| | |gamerating=E 10+ | ||
| | |gamegenre=Real-time strategy | ||
| | |gameplat=[[Nintendo Switch]] | ||
| | |gamemedia=Cartridge, digital download | ||
| | |gamepub=Nintendo | ||
|gamepre={{p3}} | |||
|gamesuc=''Pikmin: Wide World 2'' | |||
|gamedlc=''[[Pikmin: Wide World/Randomizer|Randomizer]]'' | |||
|gamecreator=[[User:Cheepy-Cheepy|Cheepy-Cheepy]] | |||
|gamecollab=[[User talk:Cheepy-Cheepy|Contact me if interested!]] | |||
|hidefam=y | |||
}} | }} | ||
'''''Pikmin: Wide World''''' is a | '''''Pikmin: Wide World''''' is a fan-made ''Pikmin'' game concept created by [[User:Cheepy-Cheepy|Cheepy-Cheepy]] and designed to mirror a traditional game in the series. As well as introducing new ideas and concepts, ''Pikmin: Wide World'' features and expands upon many used and unused aspects of all three mainline {{c|Pikmin series|''Pikmin'' games}} and {{hp}}, some features of {{pa}}, and a hint of inspiration from {{p4}}. Chronologically, it takes place immediately after the events of {{p3}}. Its sequel, ''Pikmin: Wide World 2'', takes place in a different continuity. | ||
''Pikmin: Wide World'' has one DLC expansion, the ''[[Pikmin: Wide World/Randomizer|Randomizer]]''. It also has tie-ins with other fanon media: ''[[Pikmin TCG]]'' for the upcoming ''Pikmin: Wide World'' card set, ''[[Pikmin Maker]]'' for featuring some of ''Pikmin: Wide World''{{'s}} content, and ''[[Pikmin: Antarctic Survival]]'' for its [[Pikmin: Antarctic Survival/DLC|''Pikmin: Wide World'' expansion pack]]. | |||
__TOC__ | |||
==Plot== | ==Plot== | ||
As the [[S.S. Drake]] approaches [[Hocotate]], [[Captain Olimar]] and the [[Koppai]]te trio of [[Alph]], [[Brittany]], and [[Captain Charlie]] exchange their goodbyes. The ship lands on the desolate lot of [[Hocotate Freight]], which Olimar chose as its landing site due to its familiarity. Olimar steps out of the S.S. Drake and onto the sunbaked asphalt macadam and turns to face the spacecraft to wave farewell to his saviors as they blast off into the sky. After turning his back to the dissipating pillar of smoke left in the S.S. Drake's wake, Olimar is suddenly met by the President of Hocotate Freight, [[The President|Shacho]]. | |||
Distressed, Shacho pesters Olimar about the company still being in its mountainous debt of {{pokos|55,505|y}}, which he sent Olimar and Louie to pay off, and caused by recklessly spending the company's funds on a failed business venture and taking out a massive loan at Happy Hocotate Savings and Loan to reimburse his losses, recalling what happened with the All-Devouring Black Hole Loan Sharks. He demands to know where the [[poko]]s and [[treasure]]s are, but he stops to realize that no messages were received by or sent from the [[Hocotate ship|Freight Voyager]] in days, Olimar didn't return to Hocotate in it, and [[Louie]] was once again absent. Olimar begins to explain all that happened with himself, Louie, and the ship and how he got back to Hocotate. After understanding that the vessel was totaled and knowing that the company has no other usable ships nor the funds to pay for a replacement, he pleads to Olimar for a miracle. Unsure of what to do, Olimar informs Shacho that he must return home to see his family before he can ponder the solution to the company's problems. | |||
Upon stepping through the door of his home, Olimar is greeted warmly by his wife [[Olimar's wife|Margot]], daughter [[Olimar's daughter|Libra]], son [[Olimar's son|Sagittarius]], and family pet [[Bulbie]]. They all, Bulbie included, seem to have something to show him, which Olimar notices. His family leads him, eagerly and excitedly, to the house's garage to show him the family's secret project: the [[Dolphin Lander]], who also verbally announces herself. Through Sagittarius' genius and planning, the family could construct her while Olimar was away from home. Sagittarius thoughtfully engineered her appearance to combine elements from his father's beloved [[S.S. Dolphin]] and what he knew of the [[Onion]]s of [[Pikmin family|Pikmin]]. Overcome with pride, Olimar pulls his wife and children close and holds them, thanking them dearly for the surprise, choking out his appreciation through tears of joy while Bulbie cheerfully yips and leaps about. After this heartfelt moment, Olimar wipes his face and informs his family that there is more work to be done and that he will soon return with his boss. Later, Olimar and a very grateful Shacho suit up, gather rations, and take off towards the [[PNF-404|Pikmin Planet]] to save the company yet again. | |||
Shortly before landing in [[Balmy Highlands]], a control input mistake by Olimar results in Shacho being ejected into a small circular enclosure isolated from the landscape around it. With him are a dormant [[Onion|Yellow Onion]], some [[Pellet Posy|Pellet Posies]] bearing [[pellet]]s of the same color as it, and a [[treasure]]. Their food supply is also thrown offboard due to the Dolphin Lander's malfunction and lands in a seemingly inaccessible but nearby location. Olimar lands the Dolphin Lander a small distance away, in a safe, secure area, and rushes out of the spacecraft to reunite with his boss, almost colliding with a [[crystal gate]] separating them. Olimar and Shacho discuss how to solve the issue until Olimar notices the Yellow Onion and suggests Shacho approach it. Shacho activates the Yellow Onion and, recalling what he had learned on his previous visit to PNF-404, uses the Pellet Posies to propagate some [[Yellow Pikmin]]. He returns to the crystal gate to see that Olimar also has Yellow Pikmin. Shacho, realizing that his Pikmin are of little use in escaping his predicament, throws them over the crystal gate to Olimar. | |||
Olimar leads his squad of Yellow Pikmin into a dank subterranean chamber populated by a few harmless creatures and containing a [[Juicy Gaggle]]. Olimar takes notice of an [[electrode]] and, from the sparks produced by the ends of the severed wires, concludes that the device is still functional and could be of use; the nearby charred body of a [[Female Sheargrub]] serves as support. Olimar uses a [[Pikmin: Wide World/Upgrades|jar]] he had on hand to collect the [[Sparklium|sparklium dust]] he finds after defeating the various creatures in the cave. After using Yellow Pikmin to complete the electrode's circuit, the connected device illuminates the chamber and reveals some small [[bomb rock]]s resting on a high ledge. Olimar throws his Yellow Pikmin to the bomb rocks, and the Pikmin drop down to him with their newfound weaponry in hand and follow him outside to destroy the crystal gate. | |||
Once Olimar and Shacho are reunited, they have the Yellow Pikmin pick up the treasure and the fruits they found; however, they instinctively follow the leaders and form a [[caravan]] because they do not yet know where the Dolphin Lander is. After rounding a corner, the two [[leader]]s show the Pikmin where the Dolphin Lander is so they may learn her appearance and location. Before entering the Dolphin Lander and going into orbit to avoid the dangerous nocturnal creatures that emerge after [[sunset]], Olimar and Shacho cooperate to retrieve their crate of lost rations. Although they brought twenty bottles of juice, only 6 remain intact. They drink 1 before going to sleep. | |||
The day after, Olimar and Shacho land once more in Balmy Highlands. They call their Yellow Pikmin out from their Onion and explore what they can of the area until they come across [[Temperate Retreat]], the first of many [[cave]]s they find. Before they delve in with their Pikmin, the Dolphin Lander recommends she detach her nosecone and go with them in the form of the [[Dolphin Lander|Lander Pod]] to provide storage for any spoils they find and a way to escape should they become overwhelmed. They delve in, fight off the creatures living within, recovering their bodies and the [[fruit]]s and [[treasure]]s they discover, and leave the den with the use of an [[Water geyser|escape geyser]] on its final sublevel. | |||
After returning to the surface, the Dolphin Lander voices that dens may not always yield a substantial quantity of valuables. She then suggests to Olimar and Shacho that they relax after a day's work but also tells them they may spend the rest of the day exploring more of Balmy Highlands to bolster their Pikmin populations or see what else they can find. While looking around, Olimar and Shacho may stumble upon [[Grassy Grotto]], which the Dolphin Lander urges them to explore as she detects something that may be extremely useful to their survival. If the two leaders retire to the Dolphin Lander after exiting Temperate Retreat or do not find Grassy Grotto, she will inform them that they should return to the area and continue looking around. Regardless of the decision made, after sunset, Olimar and Shacho discuss the day's events, and during the conversation, they notice a new area to explore: [[Arid Oasis]]. | |||
Upon landing the Dolphin Lander at Arid Oasis and stepping out of it, Olimar and Shacho both complain about the area's debilitating [[Temperature|heat]], which the Dolphin Lander warns could negatively impact their performance and even health, but that [[water]], or even something else they can find, could negate it. Regardless, the pair explores the tropical terrain with their Yellow Pikmin to find [[Dune Den]], or a bit beyond it, [[Blue Pikmin]] with their Onion. After discovering Blue Pikmin, Olimar and Shacho may enter and clear [[Sunken Sands]], a nearby cave, with them but may also travel further to encounter and battle the [[Titan Cottonade|Colossal Cottonade]]. The night after defeating the herculean beast, Olimar gazes out of the Dolphin Lander's window to self-reflect on how rapidly PNF-404 is changing and subconsciously gets chills when he sees [[Frigid Tundra]]. With the help of Blue Pikmin, Olimar and Shacho, at some point, return to Balmy Highlands to collect the [[Pikmin: Wide World/Upgrades|Whistle Transmitter]] and access [[Desolate Ditch]] and [[Humid Burrow]]. In Humid Burrow, they encounter a familiar [[parasitic Pikmin]] host, and the first of several they find if they've been thorough explorers: [[Bulbmin|Red Bulbmin]]. | |||
Before Olimar and Shacho exit the Dolphin Lander after first arriving at Frigid Tundra, she warns the pair that the area is cold, with Olimar and Shacho complaining in response, and reminds them that extreme temperatures can negatively impact them and even their Pikmin, following up by explaining it can be combated by staying close together, being sufficiently deep underground, or by something they could find. Afterward, the leaders head out and may find [[Snowy Recess]] and [[Lonely Quarry]]. Olimar and Shacho delve in and eventually enter a seemingly vacant sublevel populated almost exclusively by red Pellet Posies. In it, Olimar notices a gentle pulsing red glow emanating from a pile of snow in the chamber and, preparing for the worst, braces for a fight and approaches it with his Pikmin. The Pikmin begin digging at that spot, and after it springs out from underneath and ejects a single [[Red Pikmin]] seed, Olimar and Shacho let out a sigh of relief, for it is merely a Red Onion. The Red Onion finds its way out of the cave once Olimar and Shacho progress to the next sublevel with as many Red Pikmin as they want. After leaving Lonely Quarry with their newfound Red Pikmin, Olimar and Shacho may go on to clear [[Warm Sett]] and [[Flaming Trench]]. The night after discovering Red Pikmin, Shacho reflects on recent events and notices a silhouette in the landscape that reminds him of Hocotate Freight; [[Ancient Metalworks]] is discovered. With Red Pikmin now in tow, Olimar and Shacho, at some point, collect the [[Pikmin: Wide World/Upgrades|Traction Cleats]] at Frigid Tundra and return to Balmy Highlands to find the [[Watering Hole]] and [[Arid Oasis]] to find [[Sunbaked Sauna]] and [[Gritty Getaway]]. | |||
As the Dolphin Lander records Ancient Metalworks' geographical coordinates, she detects a distress signal somewhere within it. She implores Olimar and Shacho to investigate as soon as possible. As Olimar and Shacho explore the landscape, they see [[Green Pikmin (acid-resistant)|Green Pikmin]] and their Onion before delving into [[Wasted Waterworks]] with their Blue Pikmin to open the way for [[Dim Greenhouse]], the apparent origin of the distress signal. In it, Olimar and Shacho stumble upon [[Marie]], the sole survivor of an expedition crew, who is trapped in a [[web]]. After being saved, Marie introduces herself to Olimar and Shacho, who return the formality, and Marie joins them on their mission. Marie claims that she would have expired alongside her suit's life-support system in a matter of days had she not been saved. After leaving the cave, Olimar and Shacho, with Marie's help, discover [[Rock Pikmin]] after rescuing the Rock Onion. Now with Rock Pikmin, the three Hocotatians can access [[Clogged Pipeline]], and from within it, they drain a large pool of [[acid]] surrounding the Green Pikmin and their Onion. The night of Marie's rescue, the Dolphin Lander tells Olimar and Shacho that she feels more comfortable with them exploring past sunset now that they have another person to rely on. At some point, now having Rock Pikmin, Olimar and Shacho, with Marie, return to Arid Oasis to collect the [[Pikmin: Wide World/Upgrades|Jet Juicer]] and access [[Wooden Fortress]], and Frigid Tundra to access [[Stone Dugout]] and [[Icy Crevasse]]. | |||
By this point, several of the creatures native to Ancient Metalworks have dissolved into [[Plasm|a curious golden fluid]] upon their deaths, leaving no salvageable remains. While Shacho and Marie respectively express glee and wonder at the substance, Olimar grows increasingly anxious about it, for he knows all too well what it indicates the presence of. | |||
After discovering Green Pikmin, the trio delves into [[Hidden Scrapyard]] with them and discovers [[Purple Pikmin]] by throwing some Pikmin into a [[Violet Candypop Bud|Violet Candypop]]. Marie becomes noticeably emotional seeing them but does not indulge Olimar or Shacho as to why. Conveniently, in the same cave, they also find and collect the [[Pikmin: Wide World/Upgrades|PikHold]], a [[ship part]] that can be used to store most Pikmin types. The leaders will refuse to leave the cave if the device hasn't been collected, at the insistence of the Lander Pod that it is of utmost importance to them all, herself included. If the day ends at this point after leaving the cave, Marie will insist that they land at Ancient Metalworks again. | |||
With all the Pikmin types they've discovered so far at Ancient Metalworks, the leaders gain access to what was formerly the campsite of Marie, the crew she belonged to, and its captain, [[Captain Hunnigan|Hunnigan]]. Marie hesitates to enter, straying behind Olimar and Shacho as they continue, and find the Purple Onion, and encounter Hunnigan himself as a [[Captmin]], the first one seen by Marie, as well as Olimar and Shacho if they haven't explored very much. After an emotional scene involving Hunnigan, Marie finally confesses to Olimar and Shacho why and how she's on PNF-404, who Hunnigan is, why she had such an adverse reaction to Purple Pikmin, and why she didn't want to return to what they didn't know was her former camp. Marie then notifies Olimar and Shacho that she knows of a potential new area to explore but needs time to discern its exact location; she then says they should continue exploring until sundown. | |||
The next day, Olimar lands the Dolphin Lander at Frigid Tundra, stating he dreamt about Louie and had a strong suspicion about the area. The Hocotatian trio explores the arctic terrain further than they could before, potentially finding [[Frozen Lodge]], eventually encountering the [[Frosted Arcticlops|Brumal Arcticlops]]. After a long, difficult battle, the monstrous beast succumbs to its injuries, and it spits up, among several valuable items, [[Louie]], much to the surprise of Olimar, Shacho, and especially Marie. Classically, Louie does not speak, but he nods when Olimar asks if he would like to join the group. Marie expresses shock at inadvertently rescuing another individual, let alone one her companions are familiar with. All four Hocotatians briefly converse, and with Louie reunited with his coworker and employer, spend the remainder of the day accomplishing miscellaneous tasks such as collecting the [[Pikmin: Wide World/Upgrades|Sparklium Saver]], which Purple Pikmin are required to access. So long as the Brumal Arcticlops is alive, Olimar refuses to visit any other area. At some point, the party visits Arid Oasis and uses their newfound Pikmin to find and access [[Castaway Cove]] and [[Concrete Compound]]. | |||
Returning to Ancient Metalworks, all four leaders cooperate to open access to [[Chemical Reservoir]], draining most of the acid in the area, granting all of their Pikmin almost unrestricted access to any portion of it. The group then explores further with their Pikmin and eventually encounters a mighty [[Greater Bulbot|Robust Bulbot]], which, with great difficulty, they defeat. After doing so, come sundown, Olimar is unusually the last to board the Dolphin Lander. Unfortunately, his hesitance jeopardizes his safety, for the same [[Plasm Wraith]] that had so obsessively held him captive abducts him again. As it turns out, the Plasm Wraith had been inhabiting the area and, in the form of the [[Mysterious Life-Form|Plasm Goolix]], skulked out of sight by the Dolphin Lander every day at sundown after seeing Olimar there, waiting for the opportunity to strike. The Dolphin Lander and Master Onion can no longer wait for Olimar and take off without him to avoid the hostile nocturnal wildlife on the planet's surface. Shacho, alarmed and hysterical, dreads the fate of his only reliable and sane employee. Marie worries about Olimar but is unaware of his history with the Plasm Wraith. Louie merely acknowledges the incident but does not appear impacted by it. If Olimar happens to have been downed at some point during the day this occurs, he appears from the Dolphin Lander before takeoff to take in the evening air, still being the last to board the ship. | |||
The following day, Shacho, Marie, and Louie return to Ancient Metalworks and rush out of the Dolphin Lander to the [[Onion|Master Onion]]. The three Hocotatians gather their Pikmin forces and follow an apparent trail leading through a [[cinderblock gate]] into a secluded interior portion of the area, where the dreaded Plasm Wraith resides. When they finally defeat the Plasm Wraith after a long, difficult battle, it leaves behind Olimar and its golden cuboid core. They have the Pikmin take Olimar to the Dolphin Lander and the cube to the Master Onion, but not before personally ensuring that the Plasm Wraith has ceased to exist by destroying any remaining plasm. So long as Olimar remains missing, the President will refuse to land in any other area. The night of the Plasm Wraith's destruction, Marie has a period of self-reflection and, at last, reveals to Olimar, Shacho, and Louie the position of the location she mentioned before: [[Colossal Hollow]]. | |||
Immediately upon landing at Colossal Hollow, the sound and sudden appearance of the Dolphin Lander scare away the [[White Pikmin]] defending themselves against some [[Mushroom Pikmin]] at the landing site. Seeing the Mushroom Pikmin pursuing them, the four leaders rush out of the Dolphin Lander as quickly as possible and catch up with them. After uniting with the White Pikmin and separating them from their assailants, the leaders have five ways of dealing with the Mushroom Pikmin: flee, lead them away, kill them, purify them with a dose of [[black nectar]], or toss them to a nearby ledge they can not return from. | |||
Although they may risk losing their only few White Pikmin by entering a cave they now have access to because of them, the leaders may also press on through the area with or without them and inadvertently confront the [[Berserk Dweevil|Titan Weaver Dweevil]] and many of [[Webber Dweevil|its young]]. Fortunately, the White Onion appears after the goliath insect's defeat, allowing the leaders to rapidly cultivate White Pikmin by using the many remains scattered nearby. Now equipped with an essentially unlimited supply of White Pikmin, the leaders may delve into [[Subterranean Spring]], [[Dreary Sepulcher]], [[Fungal Jungle]], and [[Dank Depths]] if they haven't done so already. The night after the defeat of the Titan Weaver Dweevil, Louie takes a moment to self-reflect on his time on PNF-404 while gazing out of the Dolphin Lander's window and sees a new frontier: [[Sprawling Swamp]]. Now with the White Pikmin, the leaders eventually return to Balmy Highlands to access [[Forgotten Mine]] and [[Wayward Citadel]], Arid Oasis to access [[Lost Kingdom]], and Ancient Metalworks to access [[Polluted Pond]], [[Corroded Complex]], and [[Robot Workshop]] and collect the [[Pikmin: Wide World/Upgrades|Revitalizer]]. | |||
When preparing to land at Sprawling Swamp, the four Hocotatians see that the area is overgrown with many [[Hydroe bramble|teal bramble]]s sprawling almost everywhere. They use the first clearing they find as the area's initial landing site, and the Dolphin Lander tells the leaders that while she doesn't detect any notable valuables in the area, several powerful lifeforms are present above and below ground and that they should take extreme caution while exploring. The leaders themselves also note there being wild Pikmin somewhere. Monstrous roars echo through the distance as the leaders navigate what they can themselves, as they are unable to bring any Pikmin with them, their exploration greatly restricted by the brambles forcing them to travel an almost linear path through the area. The area is oddly vacant, being populated by only a few enemies. The only accessible cave is [[Sunless Sanctuary]] due to the brambles not blocking it off. | |||
The party continues past, over, and under many brambles and eventually makes a startling discovery: one of the brambles has coiled around the Winged Onion, suspending it in the air, with several [[Winged Pikmin]] struggling, to no avail, to free their mothership. Fortunately, the Onion is still functional and can be used to propagate Winged Pikmin, but unable to join the Dolphin Lander in orbit after takeoff and merge with the Master Onion until somehow freed. With their Winged Pikmin, the leaders continue to press on through Sprawling Swamp and pass by a large but unseen creature shrieking and struggling under a dense cluster of brambles. | |||
The roars they've been hearing become increasingly louder until they come face-to-face with the source: an angry, scornful [[Berserk Leech Hydroe|Hydroe Host]] taking the form of an almost unrecognizably mutated [[Thorned Posy]]. The leaders fight valiantly against the Hydroe Host with their Pikmin in their lengthiest and most grueling battle yet and emerge victorious because of their Winged Pikmin. As its host body becomes unusable and rapidly deteriorates alongside its brambles, the severely irritated [[Leech Hydroe]] formerly controlling it leaps off in a last-ditch effort to destroy its attackers but lands just short of the group and is utterly crushed under the valuable treasure lodged in its body. | |||
After the Hydroe Host is defeated, its thinnest brambles have already become so brittle that they are destructible from any source of damage, opening up various shortcuts to the landing site, granting access into [[Watery Grave]], [[Overgrown Garden]], and [[Muddy Murk]], and perhaps most importantly, allowing the Winged Onion its freedom even on its own; the thicker brambles also become destructible the following day. As more days pass, the hydroe brambles will further deteriorate and eventually disappear, and more creatures will repopulate the area. Now with Winged Pikmin, the leaders may return to Balmy Highlands to access [[Buzzing Reserve]] and perhaps encounter [[Alien Pikmin]] and challenge the [[Ancient Bulblax]], Frigid Tundra to access [[Webbed Lair]], and Colossal Hollow to access [[Secluded Hideaway]], [[Divers' Blight]], [[Sunlit Pit]], and [[Black Abyss]] and collect the [[Pikmin: Wide World/Upgrades|Sparklium Extractor]]. | |||
No matter whether or not the leaders return to Sprawling Swamp the day after defeating the Hydroe Host, the creature struggling under several thick brambles reveals itself to be the [[Aero Snagret|Winged Snagret]] after erupting so forcefully from underneath them as to send fragments of bramble into the air and the sound of snapping twigs echoing throughout the area. This occurs not long after the leaders would exit the Dolphin Lander, and they all would see and hear the creature escape and soar into the sky, questioning what it is, scared of what it may be, and fearing that it may attack. | |||
The Winged Snagret periodically swoops down to attack the leaders and eat any Pikmin it can get a hold of, and the only ways to deal with it are to flee from it, hide under cover, enter a cave, or kill it. Though it has a lot of vitality and can be hard to injure, it often lingers to fight before flying away again. Regardless, with the Hydroe Host dead, the leaders can destroy the thicker brambles to access more parts of the area and reach [[Pest Nest]], [[Neglected Aqueduct]], and [[Cursed Chasm]]. In a secluded portion of the area, they may even encounter a [[Quaggled Mireclops]], which the Winged Snagret will fight with if left alive; the Winged Snagret destroys the Quaggled Mireclops' crystal if it wasn't already, and is eventually forced to the ground and crushed under Quaggled Mireclops' foot, killing the snavian instantly, but not before wounding the Quaggled Mireclops. So long as they fight, neither of the two pay any mind to Pikmin, or leaders, who prefer to watch than get involved. | |||
''' | |||
Eventually, the four Hocotatians travel to the farthest reaches of Sprawling Swamp and discover the entrance to [[Destiny Cavern]], what they and the Dolphin Lander sense may be the most treacherous yet rewarding cave to be found anywhere, even if there are caves they have not yet discovered or explored elsewhere. With all the Pikmin species they've amassed during their adventure, Olimar, Shacho, Marie, and Louie delve in. They fight through multitudes of wildlife inhabiting the cave, collecting what they can along the way, and eventually reach the bottom. There, the horrible, dominating [[Grimacing Cremblub]] resides. After a long, strenuous battle of strategy and wit, the Grimacing Cremblub falls dead, and the leaders and Pikmin again prevail. | |||
=== | ===Ending=== | ||
{{ | {{spoiler}} | ||
When enough [[poko]]s have been procured to fully repay Hocotate Freight's newest debt, Olimar, Shacho, Marie, and Louie bid an emotional farewell to the Pikmin and then board the Dolphin Lander to leave PNF-404 and return to Hocotate. During the trip back to their home planet, however, the four Hocotatians agree to return to PNF-404 to continue their adventures there once the debt to Happy Hocotate Savings and Loan is repaid in person. | |||
Because of their leaders, the Pikmin relearn to survive on their own and their populations flourish as a result. Various explorers and Captmin lead the Pikmin to further victory. Olimar is wonderstruck by how quickly PNF-404 changes every time he visits the planet, marveling at his discoveries and wondering what differences there will be during his next trip there. Shacho is overjoyed that, once again, his employees could save his company and Louie was rescued. Marie mourns the loss of her crewmates, though she feels she owes her life to her saviors and would happily oblige to join them on a new adventure. Louie finds that even though he is most comfortable and happy isolated on PNF-404, being stranded there, inside an abominable snowmonster, makes him want to stay on Hocotate for a while. The Dolphin Lander feels prideful of her role in the voyage to PNF-404 and is excited to go on another adventure in the future. Hocotate Freight once again has a considerable supply of funds to its name, at least until another large debt builds up. | |||
{{endspoiler}} | |||
{{clear}} | |||
==== | ==Gameplay== | ||
Players can control and switch between leaders, who control any Pikmin following them. Pikmin can be thrown, dismissed, and ordered to perform a variety of other tasks. Pikmin can carry a large variety of objects, such as enemy corpses, [[fruit]]s, [[treasure]]s, and more. Pikmin are also utilized as the primary method of attacking enemies and destroying obstacles. | |||
New game modes are permanently unlocked when their respective [[Pikmin: Wide World/Upgrades|upgrade]] is collected in any Story Mode save game. Alternate game modes are listed in the order they are normally unlocked. Any game mode can be played with up to four other players, either locally, online, or both, who can freely join in or disconnect as they wish. Some game modes have special rules pertaining to this, however. | |||
Gameplay usually takes place from a third-person perspective, the focus placed on the current leader, and their squad if any, although the focus will shift to targets that are locked-on to. However, by selecting the [[Pikmin: Wide World/Options|option]] to do so, it is possible to play from a first-person perspective wherein the JoyCons or Pro Controller are used to look around and aim the cursor. | |||
Furthermore, four difficulties exist to alter how challenging each game mode is. They are easy, medium, hard, and ultra-spicy. The default difficulty is medium, but they can be changed between by using the [[Pikmin: Wide World/Options|options menu]]. | |||
=== | ===Story Mode=== | ||
==== | The main campaign of ''Pikmin: Wide World''. Using the main menu, up to four players can connect and play simultaneously. If there are fewer [[leader]]s than there are players, players with no unique leader will play as a transparent version of an unlocked leader, much like in {{p3d}}. If a leader is unlocked, the order in which the players joined the game will dictate who plays as that leader. For example, if there are four players and the third and fourth players have no unique leaders to play as, the third player will take control of Marie when she is saved but the fourth player will not have a unique leader to play as until Louie is saved. | ||
{{ | ===Battle Mode=== | ||
{{main|Pikmin: Wide World/Battle Mode|t1=Battle Mode}} | |||
Battle Mode is a competitive alternate game mode that is permanently unlocked upon collecting the [[Pikmin: Wide World/Upgrades|Aggression Meter]]. Up to four players can compete against one another or team up against an opposing team to win a match. | |||
===Challenge Mode=== | |||
{{main|Pikmin: Wide World/Challenge Mode|t1=Challenge Mode}} | |||
Challenge Mode is a mission-based game mode permanently unlocked by collecting the [[Pikmin: Wide World/Upgrades|Telecommunications Device]]. It has different categories to choose from, which are Produce Pikmin!, Gather Valuables!, Eliminate Enemies!, and Battle Bosses!. | |||
===Bottomless Abyss=== | |||
{{main|Pikmin: Wide World/Bottomless Abyss|t1=Bottomless Abyss}} | |||
Bottomless Abyss is permanently unlocked when the [[Pikmin: Wide World/Upgrades|Anomaly Log]] upgrade is collected. As the name suggests, it is a [[cave]] that has an indefinite amount of sublevels. Accrue as many [[Poko]]s as possible to gain a high score. | |||
{{clear}} | |||
====Arid Oasis==== | =Content= | ||
{{ | ==Main Pikmin== | ||
All main Pikmin species introduced in previous ''Pikmin'' games return in ''Pikmin: Wide World'' with the same role, and a new species, the [[acid]]-resistant [[Green Pikmin (acid-resistant)|Green Pikmin]], is introduced. All main Pikmin species have a respective [[Onion]]. These Pikmin are listed in the order they are discovered. | |||
{{clear}} | |||
===Yellow Pikmin=== | |||
[[File:PWW Yellow Pikmin.png|left|100px|link=Yellow Pikmin]] | |||
{{main|Yellow Pikmin}} | |||
Yellow Pikmin are discovered at [[Balmy Highlands]]. They are resistant to and can conduct [[electricity]]. | |||
{{clear}} | |||
===Blue Pikmin=== | |||
[[File:PWW Blue Pikmin.png|right|100px|link=Blue Pikmin]] | |||
{{main|Blue Pikmin}} | |||
Blue Pikmin are a semiaquatic species of Pikmin discovered at [[Arid Oasis]]. They are resistant to and can swim in [[water]]. | |||
{{clear}} | |||
===Red Pikmin=== | |||
[[File:PWW Red Pikmin.png|left|100px|link=Red Pikmin]] | |||
{{main|Red Pikmin}} | |||
Red Pikmin are discovered in [[Lonely Quarry]], a cave in [[Frigid Tundra]]. They are resistant to [[fire]] and [[Temperature|high temperatures]]. | |||
{{clear}} | |||
===Rock Pikmin=== | |||
[[File:PWW Rock Pikmin.png|right|100px|link=Rock Pikmin]] | |||
{{main|Rock Pikmin}} | |||
Rock Pikmin are the first Pikmin species discovered at [[Ancient Metalworks]]. [[Blunt force]] can not kill them, and they also have partial resistance to [[explosion]]s. | |||
{{clear}} | |||
===Green Pikmin=== | |||
[[File:PWW Green Pikmin.png|left|100px|link=Green Pikmin (acid-resistant)|Green Pikmin]] | |||
{{main|Green Pikmin (acid-resistant)|t1=Green Pikmin}} | |||
Green Pikmin are a new species of Pikmin discovered in [[Ancient Metalworks]], and the second to be found there. They are immune to corrosive [[acid]]. | |||
{{clear}} | |||
===Purple Pikmin=== | |||
[[File:PWW Purple Pikmin.png|right|100px|link=Purple Pikmin]] | |||
{{main|Purple Pikmin}} | |||
Purple Pikmin are the third and last of the Pikmin species discovered at [[Ancient Metalworks]], found by throwing Pikmin into one of the [[Violet Candypop Bud|Violet Candypop]]s growing in [[Hidden Scrapyard]]. They are resistant to [[panic]] and [[wind]]. | |||
{{clear}} | |||
===White Pikmin=== | |||
[[File:PWW White Pikmin.png|left|100px|link=White Pikmin]] | |||
{{main|White Pikmin}} | |||
White Pikmin are a subterranean species of Pikmin discovered at [[Colossal Hollow]], found fighting off some [[Mushroom Pikmin]]. They are resistant to [[poison]]. | |||
{{clear}} | |||
===Winged Pikmin=== | |||
[[File:PWW Winged Pikmin.png|right|100px|link=Winged Pikmin]] | |||
{{main|Winged Pikmin}} | |||
Winged Pikmin are the last main Pikmin species found, and are discovered at [[Sprawling Swamp]]. They have no resistance to any particular [[hazard]], but can fly over most dangers. | |||
{{clear}} | |||
==== | ==Other Pikmin== | ||
{{ | Some Pikmin are not classified as main Pikmin due to the conditions in which they are discovered. Most of them are hostile towards leaders, friendly Pikmin, and other lifeforms, attacking those in proximity. These Pikmin are listed in alphabetical order. | ||
===Alien Pikmin=== | |||
[[File:PWW Alien Pikmin.png|left|100px|link=Alien Pikmin]] | |||
{{main|Alien Pikmin}} | |||
Alien Pikmin are extraterrestrial Pikmin that found their way onto PNF-404. They are extremely hostile and will attack any creature that draws near. | |||
{{clear}} | |||
===Captmin=== | |||
[[File:PWW Captain Hunnigan Captmin.png|right|100px|link=Captmin]] | |||
{{main|Captmin}} | |||
Captmin are fallen explorers that have been reborn by [[Pikmin family|Pikmin]], and thus inherit the qualities of both. Pictured to the right is a notable Captmin, [[Captain Hunnigan]]. | |||
{{clear}} | |||
===Mushroom Pikmin=== | |||
[[File:PWW Mushroom Pikmin.png|left|100px|link=Mushroom Pikmin]] | |||
{{main|Mushroom Pikmin}} | |||
Mushroom Pikmin are Pikmin that have been transformed by exposure to [[spore]]s, becoming openly hostile in the process. Pictured to the left is a Mushroom [[Red Pikmin]]. | |||
{{clear}} | |||
===Parasitic Pikmin=== | |||
[[File:PWW Bulbmin.png|right|100px|link=Bulbmin|Red Bulbmin]] | |||
{{main|Parasitic Pikmin}} | |||
Parasitic Pikmin infect larger hosts and control them to survive. Adults are aggressive and are almost always accompanied by a squad of passive juveniles. Pictured to the right is the most well-known parasitic Pikmin host, the [[Bulbmin|Red Bulbmin]]. | |||
{{clear}} | |||
{{spoiler}} | |||
===Pikpik carrot=== | |||
[[File:PWW Pikpik carrot.png|left|100px|link=Pikpik carrot]] | |||
{{main|Pikpik carrot}} | |||
Pikpik carrots are an unlockable Pikmin type that can be used in Battle Mode and Bottomless Abyss by completing every challenge possible in ''Pikmin: Wide World''. Although absurdly comical in appearance, pikpik carrots have no special resistances or abilities.{{clear}} | |||
{{endspoiler}} | |||
{{clear}} | |||
==== | ==Characters== | ||
{{ | ''Pikmin: Wide World'' sees the return of several characters, but only the four playable [[leader]]s are listed here. One new character is introduced: her name is [[Marie]]. All leaders require at least three Pikmin to carry. Each leader has their own signature color and whistle. | ||
===Captain Olimar=== | |||
[[File:PWW Captain Olimar.png|right|100px|link=Captain Olimar]] | |||
{{main|Captain Olimar}} | |||
Captain Olimar is the heroic [[Hocotate|Hocotatian]] who first led the Pikmin to success. He is the captain of the [[Dolphin Lander]]. Olimar records notes detailing the biology of the lifeforms of the alien planet he is all too familiar with. | |||
{{clear}} | |||
===The President=== | |||
[[File:PWW President.png|left|100px|link=The President]] | |||
{{main|The President}} | |||
Shacho, the president of [[Hocotate Freight]], joins Captain Olimar to revisit PNF-404 in search of riches. Shacho records notes about PNF-404's lifeforms in a way that showcases his greed and, oftentimes, foolishness. He also writes sales pitches for treasures. | |||
{{clear}} | |||
===Marie=== | |||
[[File:PWW Marie.png|right|100px|link=Marie]] | |||
{{main|Marie}} | |||
Marie is a Hocotatian rescued by Olimar and Shacho. She writes notes describing how to properly train and domesticate creatures native to PNF-404. | |||
{{clear}} | |||
===Louie=== | |||
[[File:PWW Louie.png|left|100px|link=Louie]] | |||
{{main|Louie}} | |||
Louie is Olimar's intrepid companion. He retains his voracious appetite and superior culinary skills and writes recipes detailing how to prepare and cook various creatures and vegetation found on PNF-404. | |||
{{clear}} | |||
==== | ==Ships== | ||
{{ | One new ship, the [[Dolphin Lander]], owned by [[Captain Olimar]], is introduced in ''Pikmin: Wide World'', and [[Onion]]s and their various forms make a return. Although other ships such as the [[Hocotate ship|Freight Voyager]], [[S.S. Drake]], and the remains of the [[S.S. Dreamrunner]] exist, they are not included in this section. | ||
===Dolphin Lander=== | |||
[[File:PWW Dolphin Lander.png|right|100px|link=Dolphin Lander]] | |||
{{main|Dolphin Lander}} | |||
The Dolphin Lander is a one-of-a-kind spacecraft captained by Olimar. [[Sparklium]] is her fuel source, and maintaining her fuel reserves is crucial. | |||
{{clear}} | |||
===Onion=== | |||
[[File:PWW Master Onion.png|left|100px|link=Onion]] | |||
{{main|Onion}} | |||
An Onion is a lifeform used by many types of Pikmin for reproduction, shelter, protection, and transportation. They share the color of the Pikmin it produces and the Pikmin that can inhabit it. | |||
{{clear}} | |||
==== | ==Areas== | ||
{{ | ''Pikmin: Wide World'' features six expansive and unique areas to explore. Each one features eight [[cave]]s and three landing sites, and its own wildlife, [[weather]] patterns, [[Temperature|climate]], and challenges. Various [[Hidden mural|crude illustrations]] made by Pikmin can be seen on various surfaces in them. Areas are listed in order of discovery. | ||
*'''[[Balmy Highlands]]''': a luxuriant, grassy field. | |||
*'''[[Arid Oasis]]''': a beach dotted with litter, rocks, and small pools of water. | |||
*'''[[Frigid Tundra]]''': a snowy plain dotted with frozen water and ice chunks, and with some visible grass. | |||
*'''[[Ancient Metalworks]]''': a factory ruin with plenty of grass, dirt, and exposed rock, as well as metal and other industrial materials. | |||
*'''[[Colossal Hollow]]''': an expansive cavern with sunlight shining in at parts. | |||
*'''[[Sprawling Swamp]]''': a dark, dreary marshland with plenty of vegetation and little dry land. | |||
{{clear}} | |||
==Upgrades== | |||
{{see|Pikmin: Wide World/Upgrades|t1=Pikmin: Wide World upgrades}} | |||
Upgrades are collectibles that benefit leaders, and sometimes Pikmin by extension, or the Dolphin Lander. Upgrades have a variety of purposes, including unlocking alternate game modes. | |||
{{clear}} | |||
== | ==HocoPad== | ||
{{ | {{main|ToolPad}} | ||
The HocoPad is an immersive gameplay element that has several applications. Among other things, it is used to view [[data file]]s that are created or found by the leaders. | |||
{{clear}} | |||
==Encyclopedias== | |||
Various encyclopedias return in ''Pikmin: Wide World''. An [[Pikmin: Wild World/Options|option setting]] toggles whether encyclopedia progress persists between save games. | |||
===Piklopedia=== | |||
{{see|Pikmin: Wide World/Piklopedia|t1=Pikmin: Wide World Piklopedia}} | |||
The Piklopedia features every enemy seen in the official series up to {{p4}} and includes many new enemies. The only vegetation listed in the Piklopedia is unique to the world of ''Pikmin'', as most real-world vegetation is only useful for hiding under. | |||
===Treasure Hoard=== | |||
{{main|Treasure}} | |||
Treasures are valuable objects that are the primary source of [[poko]]s and [[sparklium]] because they yield so much of either upon collection. An endless supply of treasures can be collected, and it is possible to collect many instances of the same treasure. Every treasure has several unique appearances. No artificial or processed food-based treasures exist, as the beings who made them have long since been extinct. [[Fruit]]s are not considered treasures as they have a more prominent purpose: juice. | |||
===Fruit File=== | |||
{{see|Pikmin: Wide World/Fruit File|t1=Pikmin: Wide World Fruit File}} | |||
'''Fruits''' must be collected for the continued survival of the leaders, who feed on the juice they contain. While they have no poko value in Story Mode or Battle Mode, they do contain traces of [[sparklium]]. Much like treasures, there is no limit to the number of fruits that can be found. | |||
{{clear}} | |||
==Achievements== | |||
{{main|Pikmin: Wide World/Achievements|t1=Pikmin: Wide World achievements}} | |||
Achievements are objectives that challenge a player's skills to fulfill. Unlocking them provides no rewards or benefits other than player satisfaction and bragging rights. They are unlocked permanently when the requirement to do so is met, and they can be viewed through the main menu on the title screen and the pause menu. | |||
=== | ==Aspects== | ||
===Returning aspects=== | |||
{| class="mw-collapsible mw-collapsed" | |||
{|class=" | ! List of returning aspects | ||
|- | |- | ||
| | |||
;Day limit | |||
:''Pikmin: Wide World'' has a day limit, but it can be extended by collecting fruits and [[sparklium]]. Fruits are used to produce the juice the leaders use as sustenance, and sparklium is used as fuel by the Dolphin Lander. There is no set number of fruits or treasures, so the day limit can be extended virtually indefinitely. | |||
;Juice | |||
:At the end of each day, leaders drink juice to nourish themselves. Each leader can have their own serving or split one or more servings between themselves, reducing the amount of accumulated juice accordingly. A full serving will give a leader moderately increased movement and attack speed and power throughout the following day, and, as a bonus, passive but slow health recovery. One-half of a full serving will give a leader slightly improved movement and attack speed and power throughout the following day. One-fourth of a full serving yields no benefits to a leader whatsoever. Not being able to drink any juice, which is only possible if there are no whole servings in reserve, will make a leader miserable and impair their capabilities. Leaders can survive only one day cycle without consuming juice, such as if they have none, before succumbing to starvation the following night. | |||
;Difficulty | |||
:Much like in {{p3d}}, ''Pikmin: Wide World'' has various difficulties that change how challenging its gameplay is. The four difficulties are easy, normal, hard, and ultra-spicy, with normal being the default difficulty. The difficulty can be changed at any time in any game mode, though only the host can in multiplayer sessions, and changing difficulties in Story Mode forfeits any [[Pikmin: Wide World/Achievements|achievement]]s related to completing it at a specific difficulty. As the difficulty increases, leader health maximums and how long until a suffering Pikmin dies all scale down, while enemy health maximums, how many Pikmin enemies can kill at once, and damage leaders sustain from attacks scale up. Additionally, at easy and normal difficulty, enemies that could somehow hurt or kill Pikmin upon appearing, such as by falling to the ground from above, merely knock them away instead. Ultra-spicy difficulty is unlocked by completing Story Mode at hard difficulty, and in it, many enemies and bosses exhibit exclusive behaviors or attributes and there are exclusive [[data file]]s detailing them. For reference, each difficulty intensifies the aforementioned differences as follows: 0.5{{x}} for easy, 1.0{{x}} for normal, 1.5{{x}} for hard, and 2.0{{x}} for ultra-spicy. | |||
;Enemy weaknesses | |||
:Many enemies have specific parts of their bodies that, when attacked, result in different reactions from the enemy as well as different amounts of damage. For example, throwing a Pikmin directly at a bulborb's eyes will cause it to recoil and spit out any Pikmin in its mouth. Additionally, the mobility of most enemies may be reduced by swarming them or their feet, or weighing them down with Pikmin, with [[Purple Pikmin]] being the most effective in either case. | |||
;Ingestion consequences | |||
:Most organic and non-insect enemies that eat Pikmin may burp after eating them, briefly opening them up to attack, though such an occasion is uncommon. A burp will only become louder and longer the more Pikmin are ingested at once; this is more likely to occur from Purple Pikmin. Additionally, the more Pikmin an enemy eats, the more reluctant it will be to eat more; this is far more apparent in smaller enemies than larger ones. [[White Pikmin]] and [[Rock Pikmin]] also have special attributes relating to being eaten. Any enemy that is large enough and able to ingest a [[bomb rock]] and does not die from doing so will be temporarily stunned. | |||
|- | |||
;Movement tracking | |||
:Pikmin follow leaders much like they do in ''Pikmin 3'', by moving individually and following the paths leaders take. Additionally, enemies that can see will track leaders, Pikmin, or other enemies with their eyes. | |||
;Danger detection | |||
:Like in ''Pikmin 2'' and ''Pikmin 3'', an idle leader will flee from an enemy and, like in ''Pikmin 3'', announce that they are in trouble. However, they may try to hit it instead if it isn't very large, strong, or threatening, doesn't have much health remaining, or Pikmin are actively attacking it. | |||
'' | |||
;Throwing | |||
:Leaders typically throw Pikmin or leaders as quickly as the respective button can be pressed. However, Rock Pikmin, Purple Pikmin, leaders, and Captmin are thrown at a slightly slower pace than average-size Pikmin, and White Pikmin and Winged Pikmin can be thrown at a faster pace than the rest. Additionally, leaders can only throw foreign objects at full force one or two seconds after picking them up; otherwise, they drop the object. Additionally, throwing a Pikmin, leader, or object while moving forward will increase the distance they are thrown, which is reflected by the position of the cursor. | |||
;Swarming | |||
:''Pikmin: Wide World'' brings back the ability to swarm, or "group move", Pikmin in various directions. Swarming is used primarily to direct Pikmin in a squad out of harm's way without the commanding leader having to move but can also be used, rather ineffectively, to direct Pikmin into targets. The concept of charging returns from ''Pikmin 3'', acting as a faster, more focused form of swarming directed at a selected target that is also compatible with lock-on. | |||
;Selective whistling | |||
:Like in ''Pikmin 3'', Pikmin working on a task must be whistled twice in rapid succession or for a slightly longer time than Pikmin that are idle or fighting. This is to prevent Pikmin from being accidentally called away from a task by a leader whistling other nearby Pikmin. | |||
''' | ;Carrying formation | ||
:Like in ''Pikmin 3'', Pikmin carrying an object will adhere to its shape. In ''Pikmin: Wide World'', they will also attempt to distribute themselves equally along an object to distribute its weight. If they are not distributed well enough, they will appear to struggle to lift it and, as a result, drag it, although this is purely cosmetic. | |||
[[ | ;On-field Pikmin limit | ||
:The limit of on-field Pikmin returns, but has changes in its rules regarding caves like in {{p4}}. Aboveground, there can only be 100 Pikmin out at maximum, but in caves, this 100-Pikmin limit is absent. Despite this, it is unlikely to have too many more than 100 Pikmin in caves, never more than around 120. This is true even in Lonely Quarry, where Red Pikmin are found alongside their Onion, as there are only so many resources to use on one sublevel. The absence of the Pikmin limit in caves prevents players from missing out on juvenile parasitic Pikmin hosts, extra Pikmin from [[Queen Candypop Bud|Queen Candypops]], and a decent number of Red Pikmin in Lonely Quarry. Upon returning to the surface with more than 100 Pikmin, any surplus, chosen at random, will automatically be deposited into the Master Onion, or the [[Pikmin: Wide World/Upgrades|PikHold]] if it has been taken. | |||
;Health wheels | |||
:Leaders and most enemies have a health wheel to indicate their vitality, but not all look the same. Most health wheels are green and drain clockwise, and smoothly transition to yellow and then red to represent decreasing health. Uniquely, the [[Plasm Wraith]]'s health wheel has a beveled, golden appearance, but drains in the same way as a regular health wheel minus color changes. Purely robotic enemies have a distinct health wheel that resembles their weakpoints. Robotic enemies with several weakpoints have a health wheel divided into several sections, one for each weakpoint. Destroying one weakpoint causes the health wheel or one section of it, again in a clockwise fashion, to shatter. | |||
[[ | ;Enemy health | ||
:Enemies that are injured, but not killed, will regain their health overnight. New to ''Pikmin: Wide World'', enemies that are lightly injured will regain all of their health and those that are critically injured may die overnight. How quickly an enemy's health is changed from damage done to it depends on the total health of the enemy: the higher or lower the current health, the faster it regenerates or dwindles. The middle ground is between two-thirds and three-fourths health. Smaller, weaker enemies lose the ability to regain life overnight more easily than larger, hardier ones. The carcass of a boss will remain in an aboveground area for up to a day after its defeat, provided it leaves remains, although it will be infested with [[Maggot Whiskerpillar]]s by then. | |||
;Gauge interference | |||
:Some enemies can interfere with the Treasure Tracker and Fruit Finder, rendering the devices completely unreliable until they are defeated. | |||
;Leader suit polarity | |||
:The suits leaders wear on PNF-404's surface can have a positive or negative polarity that attracts or repels magnetic objects such as the [[boulder]]s of [[Decorated Cannon Larva]]e and [[Decorated Cannon Beetle]]s. Specifically, Olimar's and Louie's suits have a positive, attractive polarity, while Shacho's and Marie's suits have a negative, repulsive polarity. The [[Pikmin: Wide World/Upgrades|Metal Suit Z]] will invert the polarity of a leader's suit. | |||
;Safety zone | |||
:All Onions produce a ring of light toward [[sunset]] to display a safe zone in which Pikmin will enter their Onion automatically. Pikmin can only enter their respective Onion, making it crucial to leave Pikmin, if they must be idle, of a certain type by their Onion if that Onion is not yet incorporated into the Master Onion. | |||
;Stumbling and falling | |||
:Pikmin can stumble and fall over, even while carrying objects, and so can leaders and legged enemies. This isn't very common, but happens more often on rugged terrain. | |||
;Balanced deflowering | |||
:Pikmin can only regress in maturity under very specific circumstances. This also applies to buried Pikmin, which, much like in ''Pikmin 3'', will not wilt away and then reappear at leaf-stage maturity if left in the ground at flower-stage maturity for too long. | |||
;Dropping seeds | |||
:Returns from ''Pikmin 1''. Flowered Pikmin that die in almost any way, with few exceptions, have a slim chance to leave behind a Pikmin seed that rapidly develops into a pluckable sprout. | |||
;Hiding | |||
:Leaders and Pikmin can hide under or behind vegetation to avoid being detected by most enemies. Much like with playing dead, some enemies are not fooled. Many enemies that see leaders or Pikmin hide under vegetation or can see them actively hiding under vegetation will target them. | |||
;Assemble All | |||
:Returns from ''Pikmin 3 Deluxe'', in the form of the [[Pikmin: Wide World/Upgrades|Whistle Transmitter]]. | |||
;Leader attacks | |||
:Leaders can execute punches and kicks to damage enemies. Damage delivered to a spiked enemy in this way is split between it and the attacker unless the [[Pikmin: Wide World/Upgrades|Iron Fists]] are equipped. | |||
;Lock-on | |||
:Returns from ''Pikmin 3 Deluxe'', with minor differences. To lock-on, the current leader must be within the proximity of a target to focus on and have the cursor be close enough to them, which causes an indicator to appear above the would-be subject, allowing them to be locked-on to. Lock-ons can be canceled, although if another eligible subject is present nearby and the lock-on indicator is present above it, the focus will change to include it also. Whole groups of smaller subjects can also be targeted simultaneously, the focus changing dynamically depending on how many remain. The indicator showing that an enemy or object can be locked-on to is a light-colored triangle above the object, pointing down at it. If the cursor is locked-on, it changes from its usual look to a reticle with four triangles pointing inward. While locked-on, the cursor sticks to the subject, even if gyro controls are enabled, the camera zooms in and focuses on the subject and rotates to follow it around, and manual camera controls are disabled. Furthermore, the left and right portions of the screen darken, two curved lines appear near the darkened areas, and some textual information about the subject is displayed on the side of the screen. While locked-on to an enemy, but not an object, movement forward and backward remain normal but movement left or right results in the current leader strafing around the subject. Dodging makes the current leader and their squad roll around the object as opposed to rolling in a straight line left or right. Additionally, Pikmin charged at the subject will ignore any other nearby enemies or objects and focus solely on the locked-on one instead, and Blue Pikmin and Winged Pikmin will be able to respectively swim or fly directly to it. Any object that can be carried will also display its minimum weight when locked-on to. | |||
;Charging | |||
:Returns from ''Pikmin 3'', with minor differences. Charges can be executed by the current leader at any time and have two modes: selective, which causes only the current standby Pikmin to charge, and total, which causes all Pikmin in the squad to charge. While a charge is prepared to be executed, a leader will pose in preparation, and a stylized arrow indicating the direction of the charge, always in the direction of the cursor, is displayed until the charge is executed, or canceled by performing an action such as whistling. Upon issuing a charge, the current leader strikes a commanding pose, a horn sounds, and the Pikmin in the current squad perk up and utter a battle cry while rushing directly at the subject; when applicable, Blue Pikmin swim and Winged Pikmin fly directly to their targets. Pikmin that are made to charge at a group of subjects without being locked-on to them will prioritize targeting enemies over objects, and choose more dangerous enemies and more valuable objects than less dangerous or valuable ones. When Pikmin are charged towards an object that can be carried, they will all race towards it, but only the minimum necessary amount to start carrying it will grab on, and the rest will return. If they are charged toward an object already being carried, then only those necessary to occupy the remaining carrying space will grab on, and the others will come back. Pikmin unsuited, inapt, or not useful for the task or situation move slightly towards the target, but retreat shortly after and rejoin that leader. Reasons for this happening include charging flowered Pikmin toward a blob of nectar and charging Pikmin toward the source of a hazard they know they can not withstand. Pikmin wielding any type of [[bomb rock]] or other forms of weaponry stay by the current leader, and Pikmin outside of grabbing range at the time ignore the charge command completely. Other leaders in the current leader's squad will join charging Pikmin only if they can assist those Pikmin with whatever they are charged towards, such as by punching or kicking targeted enemies, and won't be harmed on contact with it; otherwise, they remain with their current leader. Charging Pikmin and leaders that do not reach their destination after traveling roughly the maximum throw distance will congregate there, sigh, and return to the issuing leader. However, Pikmin that find a task to do or an enemy to fight will do so. Pikmin and leaders that charge will be removed from the squad, and will be readded if they return by themselves, but they can be whistled to return sooner. When no Pikmin are present in the current squad, only a clown horn sounds and the current leader strikes their pose anyway, and any leaders accompanying them comically express embarrassment or discontentment. Some enemies can anticipate charges, especially while in battle, and will attempt to evade them; in ultra-spicy difficulty, this is frequent with many stronger, agile, or more intelligent enemies. | |||
;Pikmin interaction | |||
:All Pikmin, idle Pikmin especially, have a natural tendency to interact with or inspect anything nearby. These actions include looking around at their surroundings or each other, looking at a specific part of themselves or another Pikmin, touching each other, grooming themselves or each other, and communicating using a variety of vocalizations. When idle, Pikmin may, in addition to the aforementioned actions, also be seen sitting in a variety of positions, resting their eyes, lying down on their side, stretching, waving to nearby Pikmin or leaders, and playing abstract games such as pattycake, rock-paper-scissors, and charades. Idle Pikmin will also intently watch any nearby tasks being carried out or enemies being fought and may give a thumbs-up or another sign of approval when the task is complete or the battle is won. While idle in water that is ankle-deep to them, Pikmin may harmlessly splash each other or leaders. Blue Pikmin standing by a body of water may also playfully push another Blue Pikmin into it, the pushed Pikmin sometimes pulling the initial Pikmin into the water with them as they're falling in; the same applies to Green Pikmin and acid. The attention of occupied or idle Pikmin may also be directed towards the leaders commanding them or nearby them, as they may watch those leaders, imitate their movements, gestures, or vocalizations, and even try to wipe specks of dirt off their suit. Pikmin may, at any time outside of combat or danger, briefly sing along in unison to the current in-game music playing. Additionally, when a certain combination of certain quantities of Pikmin are in a group or idle near each other, they will sing a special tune specific to that grouping and quantity of Pikmin species, which there are [[Pikmin: Wide World/Achievements|achievement]]s for. Upon completing a task such as bringing an object to the Dolphin Lander or an Onion, clearing an obstacle, or defeating an enemy, Pikmin may cheer, and celebrate by jumping in place, performing a backflip, spinning, dancing, or high-fiving, fist-bumping, or belly-bumping Pikmin beside them. Parasitic Pikmin hosts share many of the same behaviors as ordinary Pikmin regardless if they are adults or juveniles, limited only by their physiology. Mushroom Pikmin and Alien Pikmin exhibit only a few of the idle actions other Pikmin may be seen doing, as they are far less playful and much more aggressive and alert. | |||
;Idle enemies | |||
:Any idle enemies that are not hidden may be seen wandering about their territory, looking around, sleeping in a variety of positions, or performing a variety of other actions, and may also be seen periodically stretching, grooming or scratching themselves, or drinking from nearby [[water]] bodies. Additionally, some enemies can be seen to be more awake than others at different times of the day, and some remain under cover to avoid the elements while others prefer or don't mind exposure to them. | |||
|} | |||
===New aspects=== | |||
{| class="mw-collapsible mw-collapsed" | |||
! List of new aspects | |||
|- | |||
| | |||
;Player profiles | |||
:Players have a profile banner that displays their username, in-game accomplishments, and favorite badge. The default color of the banner is blue, and players that unlock all of the game's content will earn a shiny, sparkling golden banner and an exclusive badge as a reward. | |||
;First-person perspective | |||
:Through the options menu, ''Pikmin: Wide World'' can be played from the first-person perspective of the leaders. It is possible to look in all directions, and all controls remain the same. Even cutscenes take place in first-person, complete with the heads-up display temporarily disappearing. Transitioning between leaders is done through a brief fade to black followed by a fade-in to the next leader's view. | |||
;Multiple landing sites | |||
:Every area is expansive, much larger than those in other ''Pikmin'' games. As such, each area has three total landing sites that players can choose from at the start of the day, but only one can be used and is automatically selected until another is unlocked. Unlocking a landing site consists of clearing it of enemies and general obstructions. When leaders approach a location that the Dolphin Lander deems suitable for making a landing site, it will inform them that the location can be made into one. The Dolphin Lander will also notify leaders when the location is sufficiently cleared. Once a landing site is cleared, it can start being used the following day. Over time, Hocotate Freight crates and capsules will appear around the outskirts of landing sites as they are used. These only serve as decoration and can not be interacted with in any significant way, but can be damaged and destroyed. | |||
;Leader assistance | |||
:Leaders can assist Pikmin with carrying certain objects. By default, each leader carries the weight of two Pikmin. The [[Pikmin: Wide World/Upgrades|Muscle Pumper]] allows leaders to carry the weight of up to five Pikmin. Having leaders assist Pikmin in carrying objects has more uses than needing fewer Pikmin to carry an object; if the Pikmin carrying an object that is to be delivered to the Dolphin Lander do not yet know where the spacecraft is located, a leader helping to carry the object will guide the way. Leaders can also dig up buried objects by themselves or with the help of Pikmin. | |||
;Staying past sundown | |||
:Although leaving an area at sundown is highly recommended, leaders and Pikmin can stay on PNF-404's surface until quarterway through the night. The Dolphin Lander will not allow leaders to stay on the surface past sundown for the first few days, but will eventually come to trust that they can take care of themselves after Marie is rescued. To stay past sunset, the countdown that occurs during it can be canceled. After sundown, most enemies that were active during the day will return to their nests or territories to hide or sleep; likewise, most enemies that spend the day sleeping or hiding will become active and often begin roaming about the entire area. The only illumination present besides the moon's glow is provided mainly by the leaders' beacons, but also by enemies and vegetation that produce it, the Onions, and the Dolphin Lander. Moonlight will increase or decrease depending on the phase of the moon, with a full moon providing the most light and a new moon providing almost none, as well as cloud cover in the area. Nocturnal enemies are attracted to sources of light, so extreme caution must be taken. Staying past sunset reduces how much health leaders regain by sleeping by half, and increases their juice consumption by 1.25{{x}}. | |||
;Beacon lights | |||
:In darkness, the light provided by the leaders' beacons is often the only way to see. Unfortunately, a variety of enemies are attracted, or have an adverse reaction, to the light given off by beacons and tend to gravitate toward them. By default, the color of a beacon's light matches the beacon's color, but the light's color can be toggled to colorless through the [[Pikmin: Wide World/Options|options menu]]. The beacon of a leader that is sufficiently harmed will flicker for a few moments before becoming stable again. Beacons can be deactivated from the HocoPad to gain an advantage against many enemies in the dark, although the downside to this is that visibility of the leader's immediate surroundings will be minimal to nonexistent and Pikmin will eventually begin to panic when idle and alone in total darkness for too long. Leaders that have their beacon disabled in darkness will be highlighted by a colored outline while active, and so will other leaders with disabled beacons when close enough. | |||
;Blinding lights | |||
:Using the HocoPad's camera flash, it is possible to temporarily stun or blind some enemies acclimated to darkness, rendering them defenseless for some moments. Some enemies are far more vulnerable to this than others, but some have minimal or no reaction. | |||
;Maturity intricacies | |||
:While selecting Pikmin types to take out of an Onion or the Dolphin Lander's PikHold, the specific maturity of the Pikmin to be withdrawn can also be chosen. Additionally, the maturity stage of a Pikmin has a subtle impact on its offensive capabilities; leafed Pikmin inflict 1{{x}} damage, budded Pikmin inflict 1.2{{x}} damage, and flowered Pikmin inflict 1.1{{x}} damage. Flowered Pikmin follow commands more readily than budded and leafed Pikmin. | |||
;Playing dead | |||
:Lying down has a special use during combat: playing dead. Leaders can lie down while being attacked by an enemy, which may cause that enemy to relent and resume idle behavior. While playing dead fools most enemies, others can see through the ruse and will continue their assault. | |||
;Pikmin learning and independence | |||
:In Story Mode and Endless Abyss only, Pikmin are capable of learning and can become somewhat autonomous the more familiar they are with an area, an obstacle type, or even enemies. Pikmin that are instructed to carry objects, such as fruits or treasures, to be brought to the Dolphin Lander but do not know its location will follow nearby leaders, or wander when by themselves, instead of moving toward the landing site; this mainly applies to newly-discovered Pikmin that know only where their Onion is. Those Pikmin may also attempt to deliver those objects to their Onion, not knowing where else to go, but may rarely bring it to the current landing site, seeing the Master Onion there. Either leaders or Pikmin that are familiar with the area can be assigned to assist in carrying an object to guide those new Pikmin to the landing site's location so that they may learn it, and sometimes this may naturally result in the formation of a [[caravan]]. Similarly, Pikmin that pick up a bridge fragment but have not seen the bridge it belongs to will instead follow the leader that assigned them to the task. When shown the bridge, they automatically continually return there until the bridge is finished or the pile is used up, whereupon they will all meet at the bridge's location and stay there until whistled or a leader is nearby. Pikmin can also learn which obstacles require what solutions to take down, and which parts of an enemy are more vulnerable than others. Pikmin can also learn which enemies do what and can also remember the noises or movements an enemy makes so that they may anticipate dodging an attack. Pikmin will also flee from a hostile enemy when there are too few of them to battle it or physically can not harm it. Pikmin that are not immune to a hazard will learn which ones are, and Pikmin that are immune to a hazard can learn which aren't; as such, a Pikmin that is immune to a hazard witnessing a Pikmin about to be harmed by a hazard they aren't immune to will stop them and lead them away to keep them safe. When dismissed, Pikmin that are near a hazard they are not resistant to will move the furthest away from it. Pikmin that are carrying an object will avoid walking into hazards they are not immune to, and will also refuse to carry objects around potentially dangerous enemies. Pikmin can also learn to color-coordinate [[pellet]]s. Pikmin that are both familiar with an area and know the landing site's location will slowly navigate there if they are idle for the majority of the day. At the end of the day, when the Dolphin Lander and Master Onion take off into the sky, all knowledge possessed by the Pikmin in those respective vessels will be shared. | |||
;Wild Pikmin | |||
:Sometimes, small groups of wild Pikmin idle or wander about an area or its caves, their species respective to the area they were discovered in or under. They are friendly towards allied Pikmin and will interact with them, but will attack leaders and enemies that come too close. Allied Pikmin that witness a wild Pikmin attacking leaders may display confusion or bewilderment, join in until realizing the target's identity, or try to restrain the wild Pikmin. Whistling a wild Pikmin will permanently pacify them and cause them to join the leader that whistled them. Wild Pikmin of a particular species can only be encountered after that species is formally discovered, and are only ever one of the main Pikmin types. Wild Pikmin will not try to carry objects. | |||
;Hazard exposure | |||
:Just like with plucked Pikmin, Pikmin sprouts are subject to hazards. They can not be subject to [[blunt force]], as they bend out of the way if possible, or captured inside [[bubble]]s, but are subject to other hazards, including [[pit]]s if they are somehow ejected into one. Additionally, sprouts can survive [[sunset]]s. | |||
;Ripples and waves | |||
:Movement in pools of water, acid, and nectar is noticed by creatures living in or watching it, so sneak attacks on enemies in it are virtually impossible. Stronger ripples and waves may push around anything in it, which some enemies utilize to gain an advantage over their prey. | |||
;Arming leaders | |||
:Leaders can pick up and carry [[rock]]s, smaller [[snowball]]s, any type or size of [[bomb rock]], and [[Sparklium|sparklium stone]]s, throwing or dropping the objects as needed. Upon landing, a thrown bomb rock will prime, and a stone, snowball, or dud bomb rock will damage the object as well as the enemy it impacts. Setting any of them down will not result in any changes in the objects other than them being relocated. | |||
;Abduction ignorance | |||
:Leaders, Pikmin, and objects that have been absorbed by an enemy that can not digest them will still have them trapped within itself the following day if they are not freed. Leaders that are not rescued on the same day will have critical health levels the day after if they were in good health prior, or have been put into stasis by their suit and be unusable for the rest of the day if in poor health after the first day or remained longer than that. Pikmin that are trapped will perish some days after. | |||
;Enemy intelligence | |||
:Enemies will intentionally avoid hazards that may damage them. There are two exceptions to this rule, however: one is if the enemy in question utilizes the hazard, and the other is dependent on the depth of the body of liquid. Most enemies that crawl along the ground or can not swim will avoid water that is too deep, to avoid drowning. Additionally, larger enemies will recognize their size and utilize it to step over small obstacles such as short ledges to be able to reach their prey. | |||
;Frenzied enemies | |||
:Some enemies can become temporarily frenzied under certain conditions. Frenzied enemies behave unusually and often erratically, and examples of what they may do are attacking enemies around them or moving at an accelerated rate. | |||
;Stealth | |||
:Noise, such as that produced by walking, whistling, Pikmin, leaders, some obstacles and objects, and enemies themselves may attract the attention of nearby enemies. This can be detrimental or beneficial, depending on the situation and how it is used. Some enemies can hear better than others, and so can detect sound better. However, the noise whistling produces can be changed to avoid attracting unwanted attention by obtaining the [[Pikmin: Wide World/Upgrades|Whistle Muffler]]. | |||
;Whistling Pikmin | |||
:As dangerous as whistling around enemies can be because of the noise it generates, it encourages Pikmin to recover faster, such as when they fall over or are knocked down. | |||
;Ground density | |||
:The hardness or softness of a surface type can impact gameplay. Hard surfaces such as concrete, stone, metal, and tile can not be burrowed into by enemies, and Pikmin that are subject to crushing forces on hard surfaces will be killed. The only exception is wood surfaces, which act as hard ground but can be burrowed into only by enemies. A Pikmin that is thrown into a hard surface by an enemy such as a Swooping Snitchbug will only be momentarily dazed and lie on the ground before rising to its feet, much like a leader would when thrown onto any surface by a Bumbling Snitchbug. Conversely, soft surfaces such as dirt, sand, and snow, can be burrowed into by enemies, and Pikmin forced directly into it will be buried. Leaders can also be partially buried into soft surfaces by outside forces but may free themselves by struggling out of the ground. | |||
|} | |||
=Controls= | |||
{|class=" | ''Pikmin: Wide World'' has an intuitive and easy-to-learn set of controls. | ||
{| class="mw-collapsible mw-collapsed cellspacing="2" cellpadding="2" border="1" style="width:80%; margin:auto; align:center; background-color:#0cf" | |||
|- style="background-color:#06e; color:#fff" | |||
! colspan="3" | Controls | |||
|- | |||
|- style="background-color:#06e; color:#fff" | |||
! Joy-Cons || Pro Controller || Action | |||
|- | |- | ||
| align="center" | {{button|switch|lstick|size=x24px}}<br>(lightly or fully tilted) | |||
| align="center" | {{button|switch|pclstick|size=x24px}}<br>(lightly or fully tilted) | |||
| Move the cursor. | |||
|- | |- | ||
| align="center" | {{button|switch|lstick|size=x24px}}<br>(fully held) | |||
| align="center" | {{button|switch|pclstick|size=x24px}}<br>(fully held) | |||
| Move the active leader in the direction held, or change menu options. If a leader runs into an idle Pikmin while running, it will join that leader. Leaders run a bit slower than flowered Pikmin by default. Twirl or rapidly tilt to make a leader shake off attackers that are latched onto them. | |||
|- | |- | ||
| align="center"|{{button| | | align="center" | {{button|switch|lstickclick|size=x24px}} | ||
| align="center" | {{button|switch|pclstickclick|size=x24px}} | |||
| align="center"|{{button| | | Places the cursor on top of the active leader. | ||
| | |||
|- | |- | ||
| align="center"|{{button| | | align="center" | {{button|switch|rstick|size=x24px}}<br>(lightly or fully tilted) | ||
| align="center"|{{button| | | align="center" | {{button|switch|pcrstick|size=x24px}}<br>(lightly or fully tilted) | ||
| | | Rotate the camera. In first-person, tilt to turn or look in the direction held. | ||
|- | |- | ||
| align="center"|{{button| | | align="center" | {{button|switch|rstickclick|size=x24px}} | ||
| align="center"|{{button| | | align="center" | {{button|switch|pcrstickclick|size=x24px}} | ||
| | | Swarms the leader's squad in the direction the stick is held as long as the stick remains pushed in. | ||
|- | |- | ||
| align="center"|{{button| | | align="center" | {{button|switch|a|size=x24px}} | ||
| align="center"|{{button| | | align="center" | {{button|switch|pca|size=x24px}} | ||
| | | | ||
*While commanding Pikmin: pick up a Pikmin. When the button is released, the leader throws the Pikmin. | |||
*When by a sprout: pluck the sprout out of the ground. | |||
*When by [[Nectar weed|Nectar Grass]]: pluck blades of Nectar Grass. | |||
*When directly next to any type of [[bomb rock]], a [[rock]], a smaller [[snowball]], or a [[Sparklium|sparklium stone]]: pick up the object. Press again to throw it. | |||
*Without any Pikmin or leaders and not holding an object: punch or kick. | |||
*Without any Pikmin and directly next to an object being carried by ground-based Pikmin: help carry the object. | |||
*While over the [[Dolphin Lander]]'s holographic projection: open its menu. | |||
*When in an [[Onion]]'s light: open its menu. | |||
*When in a menu: choose an option or continue. | |||
*When by a hole: enter the cave or next sublevel after confirming the action. | |||
*When by an escape geyser: leave the cave using it after confirming the action. | |||
*While Advanced Exploration mode is active: press to jump with the Jetpack if on land or perform an upward stroke if underwater. Hold to lift off with the Jetpack if on land or swim continually if underwater. | |||
|- | |- | ||
| align="center"|{{button| | | align="center" | {{button|switch|b|size=x24px}} | ||
| align="center"|{{button| | | align="center" | {{button|switch|pcb|size=x24px}} | ||
| | | | ||
*While commanding Pikmin: dismiss. | |||
*While plucking Pikmin sprouts or Nectar Grass: cancel plucking. | |||
*While carrying any type of [[bomb rock]], a [[rock]], a smaller [[snowball]], or a [[Sparklium|sparklium stone]]: drop the object. | |||
*While helping Pikmin carry an object: stop helping. | |||
*When in a menu: return to the previous menu or close the menu. | |||
|- | |- | ||
| align="center"|{{button| | | align="center" | {{button|switch|x|size=x24px}} | ||
| align="center"|{{button| | | align="center" | {{button|switch|pcx|size=x24px}} | ||
| | | | ||
Charge Pikmin in the direction of the cursor. Tap to charge the current standby Pikmin type, press to charge the entire squad, and hold to prepare a charge before executing. | |||
|- | |- | ||
| align="center"|{{button| | | align="center" | {{button|switch|y|size=x24px}} | ||
| align="center" | {{button|switch|pcy|size=x24px}} | |||
| align="center"|{{button| | | Switch [[leader]]s. Leaders may be switched between even if they are in the same squad. | ||
| | |||
|- | |- | ||
| align="center"|{{button| | | align="center" | {{button|switch|l|size=x24px}} | ||
| align="center" | {{button|switch|pcl|size=x24px}} | |||
| align="center"|{{button| | | Cycle through which Pikmin type or leader will be thrown next, even if not currently holding any Pikmin or leader. | ||
| | |||
|- | |- | ||
| align="center"|{{button| | | align="center" | {{button|switch|r|size=x24px}} | ||
| align="center"|{{button| | | align="center" | {{button|switch|pcr|size=x24px}} | ||
| | | If locked-on, places the cursor on the subject and keeps it there until canceled. Otherwise, allows moving the cursor without moving the leader while it's held. | ||
|- | |- | ||
| align="center"|{{button| | | align="center" | {{button|switch|zl|size=x24px}} | ||
| align="center" | {{button|switch|pczl|size=x24px}} | |||
| align="center"|{{button| | | Toggles lock-on while the lock-on indicator is present above a target. Otherwise, press to make the camera face the cursor, and hold to lock the cursor on the spot. | ||
| | |||
|- | |- | ||
| align="center"|{{button| | | align="center" | {{button|switch|zr|size=x24px}}<br>(tap or hold) | ||
| align="center" | {{button|switch|pczr|size=x24px}}<br>(tap or hold) | |||
| align="center"|{{button| | | Whistle. Holding causes the whistle range to expand until reaching its maximum size and stay that way until automatically ceasing. | ||
| | |||
|- | |- | ||
| align="center"|{{button| | | align="center" | {{button|switch|+|size=x24px}} | ||
| align="center"|{{button| | | align="center" | {{button|switch|pc+|size=x24px}} | ||
| | | | ||
* In-game: Pause and bring up the pause menu. Press again to unpause. | *In-game: Pause and bring up the pause menu. Press again to unpause. | ||
* In a cutscene: Skip the cutscene, if possible. | *In a cutscene: Skip the cutscene, if possible. | ||
|- | |- | ||
| align="center"|{{button| | | align="center" | {{button|switch|-|size=x24px}} | ||
| align="center"|{{button| | | align="center" | {{button|switch|pc-|size=x24px}} | ||
| | | Open or close the [[ToolPad|HocoPad]] interface. | ||
|- | |- | ||
| align="center"|{{button| | | align="center" | {{button|switch|pad|size=x24px}} | ||
| align="center"|{{button| | | align="center" | {{button|switch|pcpad|size=x24px}} | ||
| | | | ||
*Up or down: consume a dose of the [[spray]] placed in the slot respective to the direction pressed. Sprays that affect Pikmin won't be used if there aren't any in the squad. | |||
*Left or right: dodge in the respective direction if the Dodge Whistle has been obtained. | |||
*Up (held): an alternative way of activating the HocoPad's camera function. Once the camera comes up, release without consuming a spray. | |||
*Down (held): makes the active leader lie down to be carried or play dead. Once a leader lies down, release without consuming a spray. | |||
|} | |} | ||
{{navboxes| | |||
{{games}} | |||
{{ | {{PWWnav}} | ||
{{ | }} | ||
{{ | |||
[[Category:Pikmin: Wide World| ]] | |||
[[Category:Pikmin: Wide World]] | |||
Revision as of 14:41, 1 May 2024
|
This article or section presents information pertaining to Pikmin: Wide World, a fanon game created by Cheepy-Cheepy. |
| |||
|---|---|---|---|
| |||
| Rating | E 10+ | ||
| Genre | Real-time strategy | ||
| Platform | Nintendo Switch | ||
| Media | Cartridge, digital download | ||
| Publisher | Nintendo | ||
| Predecessor | Pikmin 3 | ||
| Successor | Pikmin: Wide World 2 | ||
| DLC | Randomizer | ||
| Creator | Cheepy-Cheepy | ||
| Collaborator(s) | Contact me if interested! | ||
Pikmin: Wide World is a fan-made Pikmin game concept created by Cheepy-Cheepy and designed to mirror a traditional game in the series. As well as introducing new ideas and concepts, Pikmin: Wide World features and expands upon many used and unused aspects of all three mainline Pikmin games and Hey! Pikmin, some features of Pikmin Adventure, and a hint of inspiration from Pikmin 4. Chronologically, it takes place immediately after the events of Pikmin 3. Its sequel, Pikmin: Wide World 2, takes place in a different continuity.
Pikmin: Wide World has one DLC expansion, the Randomizer. It also has tie-ins with other fanon media: Pikmin TCG for the upcoming Pikmin: Wide World card set, Pikmin Maker for featuring some of Pikmin: Wide World's content, and Pikmin: Antarctic Survival for its Pikmin: Wide World expansion pack.
Plot
As the S.S. Drake approaches Hocotate, Captain Olimar and the Koppaite trio of Alph, Brittany, and Captain Charlie exchange their goodbyes. The ship lands on the desolate lot of Hocotate Freight, which Olimar chose as its landing site due to its familiarity. Olimar steps out of the S.S. Drake and onto the sunbaked asphalt macadam and turns to face the spacecraft to wave farewell to his saviors as they blast off into the sky. After turning his back to the dissipating pillar of smoke left in the S.S. Drake's wake, Olimar is suddenly met by the President of Hocotate Freight, Shacho.
Distressed, Shacho pesters Olimar about the company still being in its mountainous debt of ![]() × 55,505, which he sent Olimar and Louie to pay off, and caused by recklessly spending the company's funds on a failed business venture and taking out a massive loan at Happy Hocotate Savings and Loan to reimburse his losses, recalling what happened with the All-Devouring Black Hole Loan Sharks. He demands to know where the pokos and treasures are, but he stops to realize that no messages were received by or sent from the Freight Voyager in days, Olimar didn't return to Hocotate in it, and Louie was once again absent. Olimar begins to explain all that happened with himself, Louie, and the ship and how he got back to Hocotate. After understanding that the vessel was totaled and knowing that the company has no other usable ships nor the funds to pay for a replacement, he pleads to Olimar for a miracle. Unsure of what to do, Olimar informs Shacho that he must return home to see his family before he can ponder the solution to the company's problems.
× 55,505, which he sent Olimar and Louie to pay off, and caused by recklessly spending the company's funds on a failed business venture and taking out a massive loan at Happy Hocotate Savings and Loan to reimburse his losses, recalling what happened with the All-Devouring Black Hole Loan Sharks. He demands to know where the pokos and treasures are, but he stops to realize that no messages were received by or sent from the Freight Voyager in days, Olimar didn't return to Hocotate in it, and Louie was once again absent. Olimar begins to explain all that happened with himself, Louie, and the ship and how he got back to Hocotate. After understanding that the vessel was totaled and knowing that the company has no other usable ships nor the funds to pay for a replacement, he pleads to Olimar for a miracle. Unsure of what to do, Olimar informs Shacho that he must return home to see his family before he can ponder the solution to the company's problems.
Upon stepping through the door of his home, Olimar is greeted warmly by his wife Margot, daughter Libra, son Sagittarius, and family pet Bulbie. They all, Bulbie included, seem to have something to show him, which Olimar notices. His family leads him, eagerly and excitedly, to the house's garage to show him the family's secret project: the Dolphin Lander, who also verbally announces herself. Through Sagittarius' genius and planning, the family could construct her while Olimar was away from home. Sagittarius thoughtfully engineered her appearance to combine elements from his father's beloved S.S. Dolphin and what he knew of the Onions of Pikmin. Overcome with pride, Olimar pulls his wife and children close and holds them, thanking them dearly for the surprise, choking out his appreciation through tears of joy while Bulbie cheerfully yips and leaps about. After this heartfelt moment, Olimar wipes his face and informs his family that there is more work to be done and that he will soon return with his boss. Later, Olimar and a very grateful Shacho suit up, gather rations, and take off towards the Pikmin Planet to save the company yet again.
Shortly before landing in Balmy Highlands, a control input mistake by Olimar results in Shacho being ejected into a small circular enclosure isolated from the landscape around it. With him are a dormant Yellow Onion, some Pellet Posies bearing pellets of the same color as it, and a treasure. Their food supply is also thrown offboard due to the Dolphin Lander's malfunction and lands in a seemingly inaccessible but nearby location. Olimar lands the Dolphin Lander a small distance away, in a safe, secure area, and rushes out of the spacecraft to reunite with his boss, almost colliding with a crystal gate separating them. Olimar and Shacho discuss how to solve the issue until Olimar notices the Yellow Onion and suggests Shacho approach it. Shacho activates the Yellow Onion and, recalling what he had learned on his previous visit to PNF-404, uses the Pellet Posies to propagate some Yellow Pikmin. He returns to the crystal gate to see that Olimar also has Yellow Pikmin. Shacho, realizing that his Pikmin are of little use in escaping his predicament, throws them over the crystal gate to Olimar.
Olimar leads his squad of Yellow Pikmin into a dank subterranean chamber populated by a few harmless creatures and containing a Juicy Gaggle. Olimar takes notice of an electrode and, from the sparks produced by the ends of the severed wires, concludes that the device is still functional and could be of use; the nearby charred body of a Female Sheargrub serves as support. Olimar uses a jar he had on hand to collect the sparklium dust he finds after defeating the various creatures in the cave. After using Yellow Pikmin to complete the electrode's circuit, the connected device illuminates the chamber and reveals some small bomb rocks resting on a high ledge. Olimar throws his Yellow Pikmin to the bomb rocks, and the Pikmin drop down to him with their newfound weaponry in hand and follow him outside to destroy the crystal gate.
Once Olimar and Shacho are reunited, they have the Yellow Pikmin pick up the treasure and the fruits they found; however, they instinctively follow the leaders and form a caravan because they do not yet know where the Dolphin Lander is. After rounding a corner, the two leaders show the Pikmin where the Dolphin Lander is so they may learn her appearance and location. Before entering the Dolphin Lander and going into orbit to avoid the dangerous nocturnal creatures that emerge after sunset, Olimar and Shacho cooperate to retrieve their crate of lost rations. Although they brought twenty bottles of juice, only 6 remain intact. They drink 1 before going to sleep.
The day after, Olimar and Shacho land once more in Balmy Highlands. They call their Yellow Pikmin out from their Onion and explore what they can of the area until they come across Temperate Retreat, the first of many caves they find. Before they delve in with their Pikmin, the Dolphin Lander recommends she detach her nosecone and go with them in the form of the Lander Pod to provide storage for any spoils they find and a way to escape should they become overwhelmed. They delve in, fight off the creatures living within, recovering their bodies and the fruits and treasures they discover, and leave the den with the use of an escape geyser on its final sublevel.
After returning to the surface, the Dolphin Lander voices that dens may not always yield a substantial quantity of valuables. She then suggests to Olimar and Shacho that they relax after a day's work but also tells them they may spend the rest of the day exploring more of Balmy Highlands to bolster their Pikmin populations or see what else they can find. While looking around, Olimar and Shacho may stumble upon Grassy Grotto, which the Dolphin Lander urges them to explore as she detects something that may be extremely useful to their survival. If the two leaders retire to the Dolphin Lander after exiting Temperate Retreat or do not find Grassy Grotto, she will inform them that they should return to the area and continue looking around. Regardless of the decision made, after sunset, Olimar and Shacho discuss the day's events, and during the conversation, they notice a new area to explore: Arid Oasis.
Upon landing the Dolphin Lander at Arid Oasis and stepping out of it, Olimar and Shacho both complain about the area's debilitating heat, which the Dolphin Lander warns could negatively impact their performance and even health, but that water, or even something else they can find, could negate it. Regardless, the pair explores the tropical terrain with their Yellow Pikmin to find Dune Den, or a bit beyond it, Blue Pikmin with their Onion. After discovering Blue Pikmin, Olimar and Shacho may enter and clear Sunken Sands, a nearby cave, with them but may also travel further to encounter and battle the Colossal Cottonade. The night after defeating the herculean beast, Olimar gazes out of the Dolphin Lander's window to self-reflect on how rapidly PNF-404 is changing and subconsciously gets chills when he sees Frigid Tundra. With the help of Blue Pikmin, Olimar and Shacho, at some point, return to Balmy Highlands to collect the Whistle Transmitter and access Desolate Ditch and Humid Burrow. In Humid Burrow, they encounter a familiar parasitic Pikmin host, and the first of several they find if they've been thorough explorers: Red Bulbmin.
Before Olimar and Shacho exit the Dolphin Lander after first arriving at Frigid Tundra, she warns the pair that the area is cold, with Olimar and Shacho complaining in response, and reminds them that extreme temperatures can negatively impact them and even their Pikmin, following up by explaining it can be combated by staying close together, being sufficiently deep underground, or by something they could find. Afterward, the leaders head out and may find Snowy Recess and Lonely Quarry. Olimar and Shacho delve in and eventually enter a seemingly vacant sublevel populated almost exclusively by red Pellet Posies. In it, Olimar notices a gentle pulsing red glow emanating from a pile of snow in the chamber and, preparing for the worst, braces for a fight and approaches it with his Pikmin. The Pikmin begin digging at that spot, and after it springs out from underneath and ejects a single Red Pikmin seed, Olimar and Shacho let out a sigh of relief, for it is merely a Red Onion. The Red Onion finds its way out of the cave once Olimar and Shacho progress to the next sublevel with as many Red Pikmin as they want. After leaving Lonely Quarry with their newfound Red Pikmin, Olimar and Shacho may go on to clear Warm Sett and Flaming Trench. The night after discovering Red Pikmin, Shacho reflects on recent events and notices a silhouette in the landscape that reminds him of Hocotate Freight; Ancient Metalworks is discovered. With Red Pikmin now in tow, Olimar and Shacho, at some point, collect the Traction Cleats at Frigid Tundra and return to Balmy Highlands to find the Watering Hole and Arid Oasis to find Sunbaked Sauna and Gritty Getaway.
As the Dolphin Lander records Ancient Metalworks' geographical coordinates, she detects a distress signal somewhere within it. She implores Olimar and Shacho to investigate as soon as possible. As Olimar and Shacho explore the landscape, they see Green Pikmin and their Onion before delving into Wasted Waterworks with their Blue Pikmin to open the way for Dim Greenhouse, the apparent origin of the distress signal. In it, Olimar and Shacho stumble upon Marie, the sole survivor of an expedition crew, who is trapped in a web. After being saved, Marie introduces herself to Olimar and Shacho, who return the formality, and Marie joins them on their mission. Marie claims that she would have expired alongside her suit's life-support system in a matter of days had she not been saved. After leaving the cave, Olimar and Shacho, with Marie's help, discover Rock Pikmin after rescuing the Rock Onion. Now with Rock Pikmin, the three Hocotatians can access Clogged Pipeline, and from within it, they drain a large pool of acid surrounding the Green Pikmin and their Onion. The night of Marie's rescue, the Dolphin Lander tells Olimar and Shacho that she feels more comfortable with them exploring past sunset now that they have another person to rely on. At some point, now having Rock Pikmin, Olimar and Shacho, with Marie, return to Arid Oasis to collect the Jet Juicer and access Wooden Fortress, and Frigid Tundra to access Stone Dugout and Icy Crevasse.
By this point, several of the creatures native to Ancient Metalworks have dissolved into a curious golden fluid upon their deaths, leaving no salvageable remains. While Shacho and Marie respectively express glee and wonder at the substance, Olimar grows increasingly anxious about it, for he knows all too well what it indicates the presence of.
After discovering Green Pikmin, the trio delves into Hidden Scrapyard with them and discovers Purple Pikmin by throwing some Pikmin into a Violet Candypop. Marie becomes noticeably emotional seeing them but does not indulge Olimar or Shacho as to why. Conveniently, in the same cave, they also find and collect the PikHold, a ship part that can be used to store most Pikmin types. The leaders will refuse to leave the cave if the device hasn't been collected, at the insistence of the Lander Pod that it is of utmost importance to them all, herself included. If the day ends at this point after leaving the cave, Marie will insist that they land at Ancient Metalworks again.
With all the Pikmin types they've discovered so far at Ancient Metalworks, the leaders gain access to what was formerly the campsite of Marie, the crew she belonged to, and its captain, Hunnigan. Marie hesitates to enter, straying behind Olimar and Shacho as they continue, and find the Purple Onion, and encounter Hunnigan himself as a Captmin, the first one seen by Marie, as well as Olimar and Shacho if they haven't explored very much. After an emotional scene involving Hunnigan, Marie finally confesses to Olimar and Shacho why and how she's on PNF-404, who Hunnigan is, why she had such an adverse reaction to Purple Pikmin, and why she didn't want to return to what they didn't know was her former camp. Marie then notifies Olimar and Shacho that she knows of a potential new area to explore but needs time to discern its exact location; she then says they should continue exploring until sundown.
The next day, Olimar lands the Dolphin Lander at Frigid Tundra, stating he dreamt about Louie and had a strong suspicion about the area. The Hocotatian trio explores the arctic terrain further than they could before, potentially finding Frozen Lodge, eventually encountering the Brumal Arcticlops. After a long, difficult battle, the monstrous beast succumbs to its injuries, and it spits up, among several valuable items, Louie, much to the surprise of Olimar, Shacho, and especially Marie. Classically, Louie does not speak, but he nods when Olimar asks if he would like to join the group. Marie expresses shock at inadvertently rescuing another individual, let alone one her companions are familiar with. All four Hocotatians briefly converse, and with Louie reunited with his coworker and employer, spend the remainder of the day accomplishing miscellaneous tasks such as collecting the Sparklium Saver, which Purple Pikmin are required to access. So long as the Brumal Arcticlops is alive, Olimar refuses to visit any other area. At some point, the party visits Arid Oasis and uses their newfound Pikmin to find and access Castaway Cove and Concrete Compound.
Returning to Ancient Metalworks, all four leaders cooperate to open access to Chemical Reservoir, draining most of the acid in the area, granting all of their Pikmin almost unrestricted access to any portion of it. The group then explores further with their Pikmin and eventually encounters a mighty Robust Bulbot, which, with great difficulty, they defeat. After doing so, come sundown, Olimar is unusually the last to board the Dolphin Lander. Unfortunately, his hesitance jeopardizes his safety, for the same Plasm Wraith that had so obsessively held him captive abducts him again. As it turns out, the Plasm Wraith had been inhabiting the area and, in the form of the Plasm Goolix, skulked out of sight by the Dolphin Lander every day at sundown after seeing Olimar there, waiting for the opportunity to strike. The Dolphin Lander and Master Onion can no longer wait for Olimar and take off without him to avoid the hostile nocturnal wildlife on the planet's surface. Shacho, alarmed and hysterical, dreads the fate of his only reliable and sane employee. Marie worries about Olimar but is unaware of his history with the Plasm Wraith. Louie merely acknowledges the incident but does not appear impacted by it. If Olimar happens to have been downed at some point during the day this occurs, he appears from the Dolphin Lander before takeoff to take in the evening air, still being the last to board the ship.
The following day, Shacho, Marie, and Louie return to Ancient Metalworks and rush out of the Dolphin Lander to the Master Onion. The three Hocotatians gather their Pikmin forces and follow an apparent trail leading through a cinderblock gate into a secluded interior portion of the area, where the dreaded Plasm Wraith resides. When they finally defeat the Plasm Wraith after a long, difficult battle, it leaves behind Olimar and its golden cuboid core. They have the Pikmin take Olimar to the Dolphin Lander and the cube to the Master Onion, but not before personally ensuring that the Plasm Wraith has ceased to exist by destroying any remaining plasm. So long as Olimar remains missing, the President will refuse to land in any other area. The night of the Plasm Wraith's destruction, Marie has a period of self-reflection and, at last, reveals to Olimar, Shacho, and Louie the position of the location she mentioned before: Colossal Hollow.
Immediately upon landing at Colossal Hollow, the sound and sudden appearance of the Dolphin Lander scare away the White Pikmin defending themselves against some Mushroom Pikmin at the landing site. Seeing the Mushroom Pikmin pursuing them, the four leaders rush out of the Dolphin Lander as quickly as possible and catch up with them. After uniting with the White Pikmin and separating them from their assailants, the leaders have five ways of dealing with the Mushroom Pikmin: flee, lead them away, kill them, purify them with a dose of black nectar, or toss them to a nearby ledge they can not return from.
Although they may risk losing their only few White Pikmin by entering a cave they now have access to because of them, the leaders may also press on through the area with or without them and inadvertently confront the Titan Weaver Dweevil and many of its young. Fortunately, the White Onion appears after the goliath insect's defeat, allowing the leaders to rapidly cultivate White Pikmin by using the many remains scattered nearby. Now equipped with an essentially unlimited supply of White Pikmin, the leaders may delve into Subterranean Spring, Dreary Sepulcher, Fungal Jungle, and Dank Depths if they haven't done so already. The night after the defeat of the Titan Weaver Dweevil, Louie takes a moment to self-reflect on his time on PNF-404 while gazing out of the Dolphin Lander's window and sees a new frontier: Sprawling Swamp. Now with the White Pikmin, the leaders eventually return to Balmy Highlands to access Forgotten Mine and Wayward Citadel, Arid Oasis to access Lost Kingdom, and Ancient Metalworks to access Polluted Pond, Corroded Complex, and Robot Workshop and collect the Revitalizer.
When preparing to land at Sprawling Swamp, the four Hocotatians see that the area is overgrown with many teal brambles sprawling almost everywhere. They use the first clearing they find as the area's initial landing site, and the Dolphin Lander tells the leaders that while she doesn't detect any notable valuables in the area, several powerful lifeforms are present above and below ground and that they should take extreme caution while exploring. The leaders themselves also note there being wild Pikmin somewhere. Monstrous roars echo through the distance as the leaders navigate what they can themselves, as they are unable to bring any Pikmin with them, their exploration greatly restricted by the brambles forcing them to travel an almost linear path through the area. The area is oddly vacant, being populated by only a few enemies. The only accessible cave is Sunless Sanctuary due to the brambles not blocking it off.
The party continues past, over, and under many brambles and eventually makes a startling discovery: one of the brambles has coiled around the Winged Onion, suspending it in the air, with several Winged Pikmin struggling, to no avail, to free their mothership. Fortunately, the Onion is still functional and can be used to propagate Winged Pikmin, but unable to join the Dolphin Lander in orbit after takeoff and merge with the Master Onion until somehow freed. With their Winged Pikmin, the leaders continue to press on through Sprawling Swamp and pass by a large but unseen creature shrieking and struggling under a dense cluster of brambles.
The roars they've been hearing become increasingly louder until they come face-to-face with the source: an angry, scornful Hydroe Host taking the form of an almost unrecognizably mutated Thorned Posy. The leaders fight valiantly against the Hydroe Host with their Pikmin in their lengthiest and most grueling battle yet and emerge victorious because of their Winged Pikmin. As its host body becomes unusable and rapidly deteriorates alongside its brambles, the severely irritated Leech Hydroe formerly controlling it leaps off in a last-ditch effort to destroy its attackers but lands just short of the group and is utterly crushed under the valuable treasure lodged in its body.
After the Hydroe Host is defeated, its thinnest brambles have already become so brittle that they are destructible from any source of damage, opening up various shortcuts to the landing site, granting access into Watery Grave, Overgrown Garden, and Muddy Murk, and perhaps most importantly, allowing the Winged Onion its freedom even on its own; the thicker brambles also become destructible the following day. As more days pass, the hydroe brambles will further deteriorate and eventually disappear, and more creatures will repopulate the area. Now with Winged Pikmin, the leaders may return to Balmy Highlands to access Buzzing Reserve and perhaps encounter Alien Pikmin and challenge the Ancient Bulblax, Frigid Tundra to access Webbed Lair, and Colossal Hollow to access Secluded Hideaway, Divers' Blight, Sunlit Pit, and Black Abyss and collect the Sparklium Extractor.
No matter whether or not the leaders return to Sprawling Swamp the day after defeating the Hydroe Host, the creature struggling under several thick brambles reveals itself to be the Winged Snagret after erupting so forcefully from underneath them as to send fragments of bramble into the air and the sound of snapping twigs echoing throughout the area. This occurs not long after the leaders would exit the Dolphin Lander, and they all would see and hear the creature escape and soar into the sky, questioning what it is, scared of what it may be, and fearing that it may attack.
The Winged Snagret periodically swoops down to attack the leaders and eat any Pikmin it can get a hold of, and the only ways to deal with it are to flee from it, hide under cover, enter a cave, or kill it. Though it has a lot of vitality and can be hard to injure, it often lingers to fight before flying away again. Regardless, with the Hydroe Host dead, the leaders can destroy the thicker brambles to access more parts of the area and reach Pest Nest, Neglected Aqueduct, and Cursed Chasm. In a secluded portion of the area, they may even encounter a Quaggled Mireclops, which the Winged Snagret will fight with if left alive; the Winged Snagret destroys the Quaggled Mireclops' crystal if it wasn't already, and is eventually forced to the ground and crushed under Quaggled Mireclops' foot, killing the snavian instantly, but not before wounding the Quaggled Mireclops. So long as they fight, neither of the two pay any mind to Pikmin, or leaders, who prefer to watch than get involved.
Eventually, the four Hocotatians travel to the farthest reaches of Sprawling Swamp and discover the entrance to Destiny Cavern, what they and the Dolphin Lander sense may be the most treacherous yet rewarding cave to be found anywhere, even if there are caves they have not yet discovered or explored elsewhere. With all the Pikmin species they've amassed during their adventure, Olimar, Shacho, Marie, and Louie delve in. They fight through multitudes of wildlife inhabiting the cave, collecting what they can along the way, and eventually reach the bottom. There, the horrible, dominating Grimacing Cremblub resides. After a long, strenuous battle of strategy and wit, the Grimacing Cremblub falls dead, and the leaders and Pikmin again prevail.
Ending
When enough pokos have been procured to fully repay Hocotate Freight's newest debt, Olimar, Shacho, Marie, and Louie bid an emotional farewell to the Pikmin and then board the Dolphin Lander to leave PNF-404 and return to Hocotate. During the trip back to their home planet, however, the four Hocotatians agree to return to PNF-404 to continue their adventures there once the debt to Happy Hocotate Savings and Loan is repaid in person.
Because of their leaders, the Pikmin relearn to survive on their own and their populations flourish as a result. Various explorers and Captmin lead the Pikmin to further victory. Olimar is wonderstruck by how quickly PNF-404 changes every time he visits the planet, marveling at his discoveries and wondering what differences there will be during his next trip there. Shacho is overjoyed that, once again, his employees could save his company and Louie was rescued. Marie mourns the loss of her crewmates, though she feels she owes her life to her saviors and would happily oblige to join them on a new adventure. Louie finds that even though he is most comfortable and happy isolated on PNF-404, being stranded there, inside an abominable snowmonster, makes him want to stay on Hocotate for a while. The Dolphin Lander feels prideful of her role in the voyage to PNF-404 and is excited to go on another adventure in the future. Hocotate Freight once again has a considerable supply of funds to its name, at least until another large debt builds up.
Gameplay
Players can control and switch between leaders, who control any Pikmin following them. Pikmin can be thrown, dismissed, and ordered to perform a variety of other tasks. Pikmin can carry a large variety of objects, such as enemy corpses, fruits, treasures, and more. Pikmin are also utilized as the primary method of attacking enemies and destroying obstacles.
New game modes are permanently unlocked when their respective upgrade is collected in any Story Mode save game. Alternate game modes are listed in the order they are normally unlocked. Any game mode can be played with up to four other players, either locally, online, or both, who can freely join in or disconnect as they wish. Some game modes have special rules pertaining to this, however.
Gameplay usually takes place from a third-person perspective, the focus placed on the current leader, and their squad if any, although the focus will shift to targets that are locked-on to. However, by selecting the option to do so, it is possible to play from a first-person perspective wherein the JoyCons or Pro Controller are used to look around and aim the cursor.
Furthermore, four difficulties exist to alter how challenging each game mode is. They are easy, medium, hard, and ultra-spicy. The default difficulty is medium, but they can be changed between by using the options menu.
Story Mode
The main campaign of Pikmin: Wide World. Using the main menu, up to four players can connect and play simultaneously. If there are fewer leaders than there are players, players with no unique leader will play as a transparent version of an unlocked leader, much like in Pikmin 3 Deluxe. If a leader is unlocked, the order in which the players joined the game will dictate who plays as that leader. For example, if there are four players and the third and fourth players have no unique leaders to play as, the third player will take control of Marie when she is saved but the fourth player will not have a unique leader to play as until Louie is saved.
Battle Mode
- Main article: Battle Mode
Battle Mode is a competitive alternate game mode that is permanently unlocked upon collecting the Aggression Meter. Up to four players can compete against one another or team up against an opposing team to win a match.
Challenge Mode
- Main article: Challenge Mode
Challenge Mode is a mission-based game mode permanently unlocked by collecting the Telecommunications Device. It has different categories to choose from, which are Produce Pikmin!, Gather Valuables!, Eliminate Enemies!, and Battle Bosses!.
Bottomless Abyss
- Main article: Bottomless Abyss
Bottomless Abyss is permanently unlocked when the Anomaly Log upgrade is collected. As the name suggests, it is a cave that has an indefinite amount of sublevels. Accrue as many Pokos as possible to gain a high score.
Content
Main Pikmin
All main Pikmin species introduced in previous Pikmin games return in Pikmin: Wide World with the same role, and a new species, the acid-resistant Green Pikmin, is introduced. All main Pikmin species have a respective Onion. These Pikmin are listed in the order they are discovered.
Yellow Pikmin
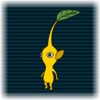
- Main article: Yellow Pikmin
Yellow Pikmin are discovered at Balmy Highlands. They are resistant to and can conduct electricity.
Blue Pikmin
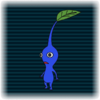
- Main article: Blue Pikmin
Blue Pikmin are a semiaquatic species of Pikmin discovered at Arid Oasis. They are resistant to and can swim in water.
Red Pikmin
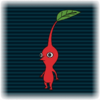
- Main article: Red Pikmin
Red Pikmin are discovered in Lonely Quarry, a cave in Frigid Tundra. They are resistant to fire and high temperatures.
Rock Pikmin
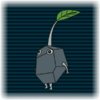
- Main article: Rock Pikmin
Rock Pikmin are the first Pikmin species discovered at Ancient Metalworks. Blunt force can not kill them, and they also have partial resistance to explosions.
Green Pikmin
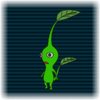
- Main article: Green Pikmin
Green Pikmin are a new species of Pikmin discovered in Ancient Metalworks, and the second to be found there. They are immune to corrosive acid.
Purple Pikmin

- Main article: Purple Pikmin
Purple Pikmin are the third and last of the Pikmin species discovered at Ancient Metalworks, found by throwing Pikmin into one of the Violet Candypops growing in Hidden Scrapyard. They are resistant to panic and wind.
White Pikmin
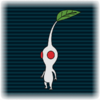
- Main article: White Pikmin
White Pikmin are a subterranean species of Pikmin discovered at Colossal Hollow, found fighting off some Mushroom Pikmin. They are resistant to poison.
Winged Pikmin
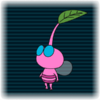
- Main article: Winged Pikmin
Winged Pikmin are the last main Pikmin species found, and are discovered at Sprawling Swamp. They have no resistance to any particular hazard, but can fly over most dangers.
Other Pikmin
Some Pikmin are not classified as main Pikmin due to the conditions in which they are discovered. Most of them are hostile towards leaders, friendly Pikmin, and other lifeforms, attacking those in proximity. These Pikmin are listed in alphabetical order.
Alien Pikmin

- Main article: Alien Pikmin
Alien Pikmin are extraterrestrial Pikmin that found their way onto PNF-404. They are extremely hostile and will attack any creature that draws near.
Captmin
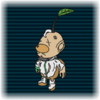
- Main article: Captmin
Captmin are fallen explorers that have been reborn by Pikmin, and thus inherit the qualities of both. Pictured to the right is a notable Captmin, Captain Hunnigan.
Mushroom Pikmin
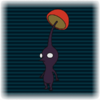
- Main article: Mushroom Pikmin
Mushroom Pikmin are Pikmin that have been transformed by exposure to spores, becoming openly hostile in the process. Pictured to the left is a Mushroom Red Pikmin.
Parasitic Pikmin
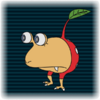
- Main article: Parasitic Pikmin
Parasitic Pikmin infect larger hosts and control them to survive. Adults are aggressive and are almost always accompanied by a squad of passive juveniles. Pictured to the right is the most well-known parasitic Pikmin host, the Red Bulbmin.
Pikpik carrot

- Main article: Pikpik carrot
Pikpik carrots are an unlockable Pikmin type that can be used in Battle Mode and Bottomless Abyss by completing every challenge possible in Pikmin: Wide World. Although absurdly comical in appearance, pikpik carrots have no special resistances or abilities.
Characters
Pikmin: Wide World sees the return of several characters, but only the four playable leaders are listed here. One new character is introduced: her name is Marie. All leaders require at least three Pikmin to carry. Each leader has their own signature color and whistle.
Captain Olimar
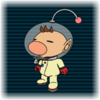
- Main article: Captain Olimar
Captain Olimar is the heroic Hocotatian who first led the Pikmin to success. He is the captain of the Dolphin Lander. Olimar records notes detailing the biology of the lifeforms of the alien planet he is all too familiar with.
The President
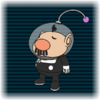
- Main article: The President
Shacho, the president of Hocotate Freight, joins Captain Olimar to revisit PNF-404 in search of riches. Shacho records notes about PNF-404's lifeforms in a way that showcases his greed and, oftentimes, foolishness. He also writes sales pitches for treasures.
Marie
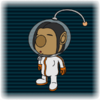
- Main article: Marie
Marie is a Hocotatian rescued by Olimar and Shacho. She writes notes describing how to properly train and domesticate creatures native to PNF-404.
Louie
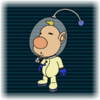
- Main article: Louie
Louie is Olimar's intrepid companion. He retains his voracious appetite and superior culinary skills and writes recipes detailing how to prepare and cook various creatures and vegetation found on PNF-404.
Ships
One new ship, the Dolphin Lander, owned by Captain Olimar, is introduced in Pikmin: Wide World, and Onions and their various forms make a return. Although other ships such as the Freight Voyager, S.S. Drake, and the remains of the S.S. Dreamrunner exist, they are not included in this section.
Dolphin Lander
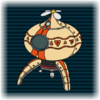
- Main article: Dolphin Lander
The Dolphin Lander is a one-of-a-kind spacecraft captained by Olimar. Sparklium is her fuel source, and maintaining her fuel reserves is crucial.
Onion
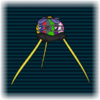
- Main article: Onion
An Onion is a lifeform used by many types of Pikmin for reproduction, shelter, protection, and transportation. They share the color of the Pikmin it produces and the Pikmin that can inhabit it.
Areas
Pikmin: Wide World features six expansive and unique areas to explore. Each one features eight caves and three landing sites, and its own wildlife, weather patterns, climate, and challenges. Various crude illustrations made by Pikmin can be seen on various surfaces in them. Areas are listed in order of discovery.
- Balmy Highlands: a luxuriant, grassy field.
- Arid Oasis: a beach dotted with litter, rocks, and small pools of water.
- Frigid Tundra: a snowy plain dotted with frozen water and ice chunks, and with some visible grass.
- Ancient Metalworks: a factory ruin with plenty of grass, dirt, and exposed rock, as well as metal and other industrial materials.
- Colossal Hollow: an expansive cavern with sunlight shining in at parts.
- Sprawling Swamp: a dark, dreary marshland with plenty of vegetation and little dry land.
Upgrades
Upgrades are collectibles that benefit leaders, and sometimes Pikmin by extension, or the Dolphin Lander. Upgrades have a variety of purposes, including unlocking alternate game modes.
HocoPad
- Main article: ToolPad
The HocoPad is an immersive gameplay element that has several applications. Among other things, it is used to view data files that are created or found by the leaders.
Encyclopedias
Various encyclopedias return in Pikmin: Wide World. An option setting toggles whether encyclopedia progress persists between save games.
Piklopedia
The Piklopedia features every enemy seen in the official series up to Pikmin 4 and includes many new enemies. The only vegetation listed in the Piklopedia is unique to the world of Pikmin, as most real-world vegetation is only useful for hiding under.
Treasure Hoard
- Main article: Treasure
Treasures are valuable objects that are the primary source of pokos and sparklium because they yield so much of either upon collection. An endless supply of treasures can be collected, and it is possible to collect many instances of the same treasure. Every treasure has several unique appearances. No artificial or processed food-based treasures exist, as the beings who made them have long since been extinct. Fruits are not considered treasures as they have a more prominent purpose: juice.
Fruit File
Fruits must be collected for the continued survival of the leaders, who feed on the juice they contain. While they have no poko value in Story Mode or Battle Mode, they do contain traces of sparklium. Much like treasures, there is no limit to the number of fruits that can be found.
Achievements
- Main article: Pikmin: Wide World achievements
Achievements are objectives that challenge a player's skills to fulfill. Unlocking them provides no rewards or benefits other than player satisfaction and bragging rights. They are unlocked permanently when the requirement to do so is met, and they can be viewed through the main menu on the title screen and the pause menu.
Aspects
Returning aspects
| List of returning aspects |
|---|
|
New aspects
| List of new aspects |
|---|
|
Controls
Pikmin: Wide World has an intuitive and easy-to-learn set of controls.
| Controls | ||
|---|---|---|
| Joy-Cons | Pro Controller | Action |
(lightly or fully tilted) |
(lightly or fully tilted) |
Move the cursor. |
(fully held) |
(fully held) |
Move the active leader in the direction held, or change menu options. If a leader runs into an idle Pikmin while running, it will join that leader. Leaders run a bit slower than flowered Pikmin by default. Twirl or rapidly tilt to make a leader shake off attackers that are latched onto them. |
| Places the cursor on top of the active leader. | ||
(lightly or fully tilted) |
(lightly or fully tilted) |
Rotate the camera. In first-person, tilt to turn or look in the direction held. |
| Swarms the leader's squad in the direction the stick is held as long as the stick remains pushed in. | ||
| ||
| ||
|
Charge Pikmin in the direction of the cursor. Tap to charge the current standby Pikmin type, press to charge the entire squad, and hold to prepare a charge before executing. | ||
| Switch leaders. Leaders may be switched between even if they are in the same squad. | ||
| Cycle through which Pikmin type or leader will be thrown next, even if not currently holding any Pikmin or leader. | ||
| If locked-on, places the cursor on the subject and keeps it there until canceled. Otherwise, allows moving the cursor without moving the leader while it's held. | ||
| Toggles lock-on while the lock-on indicator is present above a target. Otherwise, press to make the camera face the cursor, and hold to lock the cursor on the spot. | ||
(tap or hold) |
(tap or hold) |
Whistle. Holding causes the whistle range to expand until reaching its maximum size and stay that way until automatically ceasing. |
| ||
| Open or close the HocoPad interface. | ||
| ||